

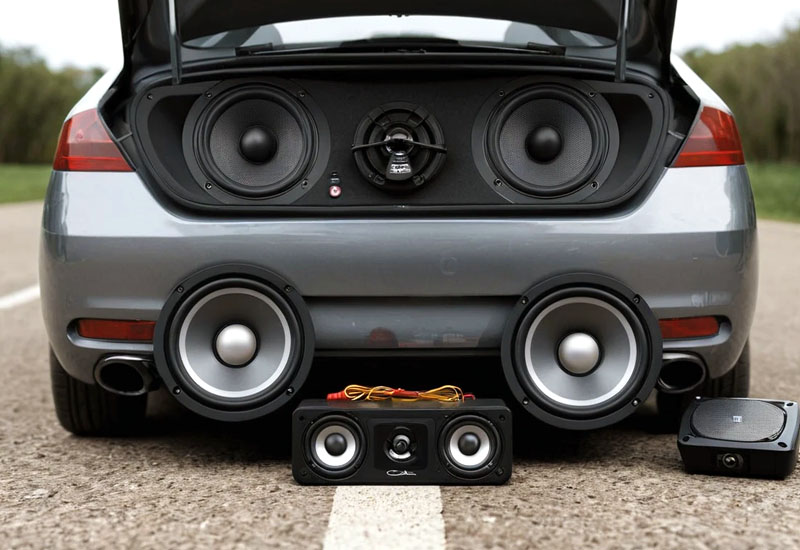
Car speakers play a crucial role in the overall audio experience of your vehicle. Whether you’re an audiophile aiming for the best sound quality or just looking to replace a damaged speaker, knowing how to measure car speakers is essential. This guide will take you through the steps of measuring car speakers accurately, ensuring you make the right choice for your vehicle.
Understanding Car Speaker Measurements
Before diving into the measurement process, it’s important to understand what you will be measuring. Car speakers come in various sizes and shapes, and knowing the different dimensions and specifications is crucial.
The Importance of Accurate Measurements
Accurate measurements ensure that the new speakers will fit properly in your car’s existing speaker locations. Incorrect measurements can lead to poor sound quality, rattling, and even damage to your vehicle or speakers.
Tools You Will Need
To measure car speakers, you’ll need a few basic tools. These include a tape measure or ruler, a notepad and pen for recording measurements, a screwdriver for removing the speakers, and a template or mounting bracket to compare sizes.
Understanding Speaker Size Notations
Speaker sizes are usually noted in inches and refer to the diameter of the speaker. Common sizes include 6.5 inches, 6×9 inches, and 4 inches. However, these sizes can vary slightly between manufacturers, so precise measurements are necessary.
Why Measure Your Car Speakers?
Measuring your car speakers helps you understand the space available and choose the right replacement speakers. It also ensures compatibility with your car’s audio system, improving sound quality and performance.
Differences Between Speaker Types
There are different types of car speakers, such as coaxial and component speakers. Each type may have different mounting requirements, so understanding these differences will help you measure accurately.
Preparing Your Car for Measurement
Before measuring, prepare your car by disconnecting the battery to avoid any electrical issues. Remove any panels or grills covering the speakers to access them easily.
Measuring Car Speaker Dimensions
Now that you have a basic understanding, let’s dive into the actual measurement process. This section will guide you through each step to ensure you get precise measurements.
Removing the Existing Speaker
To measure the speaker, you’ll first need to remove it from your car. Use a screwdriver to carefully remove any screws holding the speaker in place. Be gentle to avoid damaging any components.
Measuring the Speaker Diameter
The most important measurement is the speaker diameter. Measure across the speaker cone, including the mounting frame. This measurement will help you find a speaker that fits your car’s existing speaker hole.
Measuring the Mounting Depth
The mounting depth is the distance from the mounting surface to the deepest part of the speaker. This is crucial to ensure the new speaker doesn’t hit any obstructions inside the door or dashboard.
Measuring the Cutout Diameter
The cutout diameter is the size of the hole in which the speaker sits. Measure the diameter of the hole to ensure your new speaker will fit snugly without any gaps.
Measuring the Mounting Height
The mounting height is the distance from the mounting surface to the highest point of the speaker. This is important to ensure the speaker doesn’t protrude too much, which could interfere with door panels or grills.
Checking for Obstructions
Before finalizing your measurements, check for any obstructions behind the speaker mounting area. Ensure there is enough space for the speaker and its wiring without any interference.
Choosing the Right Replacement Speaker
With your measurements in hand, you can now choose the right replacement speaker. This section will guide you through the considerations and options available.
Matching Speaker Size
Choose a replacement speaker that matches the size of your existing speaker. This ensures a proper fit and avoids the need for modifications to your car’s speaker holes.
Considering Speaker Type
Decide whether you want coaxial or component speakers. Coaxial speakers are easier to install and often more affordable, while component speakers offer superior sound quality but may require additional installation steps.
Checking Power Handling
Ensure the new speaker can handle the power output of your car’s audio system. Check the RMS and peak power ratings to avoid damaging the speaker or amplifier.
Reviewing Sensitivity Rating
The sensitivity rating indicates how efficiently a speaker converts power into sound. Higher sensitivity ratings mean louder sound for the same power input, so choose a speaker with a suitable sensitivity for your needs.
Evaluating Frequency Response
Frequency response indicates the range of sounds a speaker can reproduce. A wider frequency range means better sound quality, so look for speakers with a broad frequency response for optimal performance.
Considering Speaker Materials
Speaker materials affect sound quality and durability. Look for speakers made with high-quality materials like polypropylene cones, rubber surrounds, and silk tweeters for the best performance and longevity.
Installing Your New Car Speakers
After selecting the right replacement speakers, it’s time to install them. This section will guide you through the installation process to ensure everything fits and works perfectly.
Preparing the Mounting Area
Clean the mounting area to remove any dust or debris. This ensures a secure fit for your new speakers and prevents any unwanted vibrations or noise.
Connecting the Wiring
Carefully connect the speaker wiring to the new speakers. Ensure the positive and negative terminals match the corresponding wires to avoid phase issues, which can affect sound quality.
Securing the Speaker
Place the speaker into the mounting hole and secure it with screws. Make sure the speaker is firmly in place without over-tightening, which could damage the speaker frame or mounting surface.
Testing the Speaker
Before reassembling the panels or grills, test the speaker to ensure it works correctly. Play some music and listen for any distortions or issues. Adjust the position if necessary for optimal sound quality.
Reassembling the Car Interior
Once you’re satisfied with the speaker installation, reassemble any panels or grills you removed. Ensure everything is securely in place and looks neat.
Final Sound Check
Perform a final sound check with your car’s audio system. Adjust the balance and fade settings to ensure the new speakers blend well with the existing ones and provide a balanced sound experience.
Are These Questions in Your Mind?
Even after a detailed guide, you might still have some questions about measuring car speakers. Here are some frequently asked questions that might be on your mind.
Is it Difficult to Measure Car Speakers?
Measuring car speakers is not difficult if you follow the steps outlined in this guide. With the right tools and careful attention, anyone can do it.
Can I Measure Car Speakers Without Removing Them?
While it’s possible to get an approximate measurement without removing the speakers, for accurate results, it’s best to remove them and measure directly.
Do I Need Professional Help to Measure Car Speakers?
You don’t necessarily need professional help to measure car speakers. However, if you’re unsure or uncomfortable with the process, consulting a professional might be beneficial.
Can I Replace My Car Speakers Myself?
Yes, you can replace your car speakers yourself if you follow the proper steps and guidelines. This guide provides a comprehensive overview to help you through the process.
Is it Worth Upgrading Car Speakers?
Upgrading car speakers can significantly improve your car’s audio quality. If you enjoy listening to music while driving, investing in better speakers is definitely worth it.
Do I Need to Upgrade My Car’s Audio System?
You don’t always need to upgrade the entire audio system when replacing speakers. However, ensuring your new speakers are compatible with your existing system is important for the best performance.
Can I Use Different Sized Speakers?
Using different sized speakers is possible but requires modifications to the mounting area. For the best fit and easiest installation, it’s recommended to stick with the same size.
Is Speaker Sensitivity Important?
Speaker sensitivity is important as it affects how loud your speakers can get with a given power input. Choosing the right sensitivity for your car’s audio system is crucial for optimal performance.
Can I Mix Different Brands of Speakers?
You can mix different brands of speakers, but it’s essential to ensure they are compatible and provide a balanced sound. Matching the power handling and sensitivity can help achieve a cohesive audio experience.
Do I Need Special Tools to Measure Car Speakers?
You don’t need special tools to measure car speakers. A tape measure or ruler, screwdriver, and notepad are usually sufficient for accurate measurements.
I hope this guide has helped you understand how to measure car speakers accurately. With the right measurements, you can ensure a perfect fit and enjoy the best audio experience in your vehicle.
