

To remove pinstripes from a car, you can use a heat gun or a hairdryer to warm up the adhesive underneath the pinstripes, and then gently peel them off. Be sure to use a plastic scraper or your fingers to avoid damaging the car’s paintwork.

Credit: vvividshop.com
Preparation
Want to remove pinstripes from your car? Here are some easy steps to prepare yourself before getting started.
Cleaning The Car’s Surface
Cleaning the car’s surface is an essential step in the preparation process for removing pinstripes. Before you start, make sure the car is parked in a shaded area to prevent the cleaning solution from drying too quickly. Begin by rinsing the car’s surface with water to remove any loose dirt and debris. Next, prepare a mixture of car shampoo and water in a bucket. Use a sponge or microfiber cloth to gently wash the entire car, paying extra attention to the areas with pinstripes. The goal is to remove any dirt or grime that may interfere with the pinstripe removal process. After washing, rinse the car thoroughly with clean water and dry it using a soft, lint-free towel. A clean and dry surface will ensure a smooth and effective pinstripe removal process.Protecting The Surrounding Areas
When removing pinstripes from your car, it’s crucial to protect the surrounding areas to avoid accidental damage. Start by applying masking tape or painter’s tape around the edges of the pinstripes, creating a barrier between the pinstripes and the rest of the car’s surface. This will prevent any accidental scratching or scuffing of the paintwork during the removal process. Additionally, consider using a protective film or plastic sheeting to cover any vulnerable areas near the pinstripes, such as headlights, mirrors, or door handles. By taking these precautions, you can ensure that only the pinstripes are affected during the removal process, keeping the rest of your car’s finish intact.Summary
To prepare for removing pinstripes from your car, it’s important to clean the car’s surface thoroughly and protect the surrounding areas. Cleaning the car’s surface involves rinsing the car, washing it with a mixture of car shampoo and water, and then drying it with a soft towel. This step ensures that the pinstripe removal process goes smoothly. To protect the surrounding areas, apply masking tape or painter’s tape around the edges of the pinstripes, and consider using a protective film or plastic sheeting on vulnerable areas. Taking these preparatory steps will set the stage for a successful and damage-free pinstripe removal process.Methods To Remove Pinstripes
When it comes to removing pinstripes from your car, you have several options to choose from. In this section, we will discuss three popular methods that can help you achieve a professional-looking result. Each method has its own unique approach, allowing you to select the one that best suits your needs. Let’s take a closer look at these methods.
Method 1: Using A Heat Gun
If you want to remove pinstripes quickly and efficiently, using a heat gun is a great option. This method involves using heat to soften the adhesive, making it easier to peel off the pinstripes. Here’s how you can do it:
- Start by plugging in the heat gun and setting it to a low or medium heat setting. Make sure to keep the nozzle a few inches away from the pinstripe to avoid damaging the car’s paint.
- Direct the heat gun towards one end of the pinstripe and move it back and forth in a sweeping motion. The heat will gradually loosen the adhesive, allowing you to peel off the pinstripe with a plastic scraper or your fingers.
- Continue this process along the entire length of the pinstripe until it is completely removed.
- Once you have removed the pinstripe, use a mild adhesive remover or soap and water to clean any residue left behind.
Method 2: Using Adhesive Remover
Another effective method for removing pinstripes is to use an adhesive remover. This method is suitable for removing stubborn pinstripes or adhesive residue left behind after using a heat gun. Follow these steps to use an adhesive remover:
- Choose a suitable adhesive remover that is safe for use on automotive surfaces. Test a small, inconspicuous area of your car first to ensure that the product does not damage the paint.
- Apply the adhesive remover directly to the pinstripe and let it sit for a few minutes to penetrate the adhesive.
- Using a plastic scraper or your fingers, gently peel off the pinstripe. If necessary, reapply the adhesive remover to stubborn areas and repeat the process.
- Once the pinstripe is removed, clean the surface with soap and water to remove any remaining adhesive remover residue.
Method 3: Using A Mechanical Method
If you prefer a more hands-on approach, using a mechanical method such as a eraser wheel or a rubbing compound can be an effective way to remove pinstripes. Here’s how:
- Start by purchasing an eraser wheel or a rubbing compound from your local automotive store.
- Follow the manufacturer’s instructions for using the eraser wheel or apply the rubbing compound directly to the pinstripe.
- Using a microfiber cloth or a buffing pad attached to a drill, rub the eraser wheel or rubbing compound onto the pinstripe with moderate pressure.
- Continue this process until the pinstripe is completely removed.
- Clean the surface thoroughly to remove any residue left behind by the eraser wheel or rubbing compound.
You now have three effective methods to remove pinstripes from your car. Remember to take proper precautions such as wearing gloves and eye protection, as some methods may involve the use of heat or chemicals. Choose the method that works best for you and enjoy the satisfaction of a pinstripe-free vehicle.
Removing Residue And Polishing
Once you have successfully removed the pinstripes from your car, the next step is to tackle any adhesive residue that remains. Additionally, it’s essential to polish and wax the car to restore its shine and protect the paint. Follow these steps to effectively remove residue and give your car a polished finish.
Removing Adhesive Residue
In order to remove the stubborn adhesive residue left behind after peeling off the pinstripes, you will need some common household items:
- Isopropyl alcohol or adhesive remover
- Clean, soft microfiber cloth
- Plastic scraper or credit card
Here’s how you can get rid of the adhesive residue:
- Apply a small amount of isopropyl alcohol or adhesive remover to the residue.
- Gently rub the area using a clean, soft microfiber cloth. The alcohol or adhesive remover will help break down the sticky residue.
- If the residue is particularly stubborn, you can use a plastic scraper or credit card to carefully scrape it off. Be cautious not to scratch the paint.
- Continue rubbing and scraping until all the residue is removed.
- Once the residue is gone, wipe the area clean with a new microfiber cloth to remove any remaining residue or cleaner.
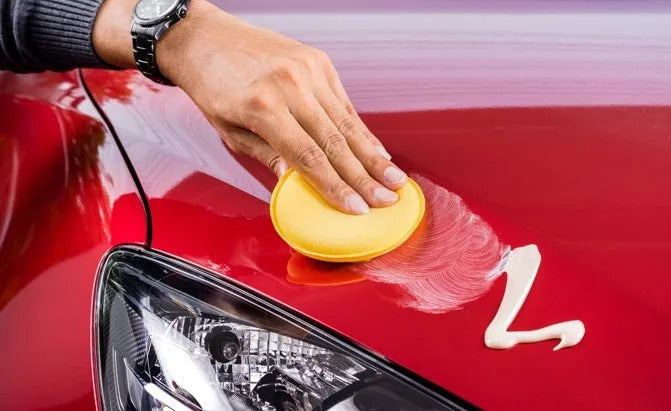
Polishing And Waxing The Car
After removing the residue, it’s time to give your car a fresh look by polishing and waxing it. This process will not only enhance the shine but also provide a protective layer on the paint surface. Follow these steps:
- Wash your car thoroughly to remove any dirt or grime.
- Dry the car completely using a clean microfiber cloth.
- Apply a high-quality car polish to a foam applicator pad or soft cloth.
- In circular motions, gently rub the polish onto the car’s surface. Focus on one section at a time.
- Continue polishing until the entire car has been covered.
- Allow the polish to dry according to the instructions on the product.
- Once dry, use a clean microfiber cloth to buff and remove the dried polish residue.
- Now, it’s time to protect your car with wax. Apply a thin layer of car wax onto another foam applicator pad or soft cloth.
- Gently apply the wax in circular motions, covering the entire car surface.
- Allow the wax to dry as per the product instructions.
- Once dry, use a clean microfiber cloth to buff the waxed surface, giving your car a glossy finish.
By following these steps, you can successfully remove adhesive residue and achieve a polished look for your car, making it look as good as new. Remember to always use gentle techniques to avoid damaging the paint and apply products according to the instructions provided. Now you can enjoy a pristine, pinstripe-free car!
Credit: ethoscarcare.com

Credit: www.amazon.com
Conclusion
Removing pinstripes from a car can be a challenging task, but with the right approach, it is definitely doable. By following the steps outlined in this blog post, you can successfully remove pinstripes from your car’s surface. Remember to be patient, use the right tools, and take necessary precautions to avoid any damage to your car’s paintwork.
With some time and effort, your car will be pinstripe-free and ready to hit the road in style again.
