
To fix car roof lining without removing it, you can use a strong adhesive specifically designed for automotive interior repairs. Apply the adhesive directly to the areas where the lining is sagging or coming loose, using a small brush or applicator.
Press the lining firmly against the roof and hold it in place until the adhesive dries completely. Make sure to clean the roof thoroughly before applying the adhesive to ensure proper adhesion. By following these steps, you can easily fix your car’s roof lining without the need for removal.
Credit: carfromjapan.com
Understanding The Problem
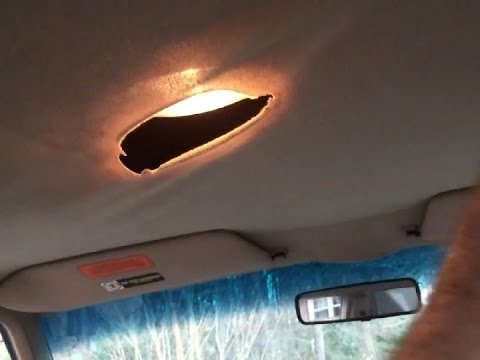
If you’ve noticed sagging or peeling material on the roof of your car, it’s likely that your car roof lining needs some attention. The car roof lining, also known as the headliner, is the fabric or foam material that is attached to the interior roof of your car. Over time, it can start to deteriorate and lose its adhesive properties, causing it to sag, detach or develop unsightly wrinkles.
What Is Car Roof Lining?
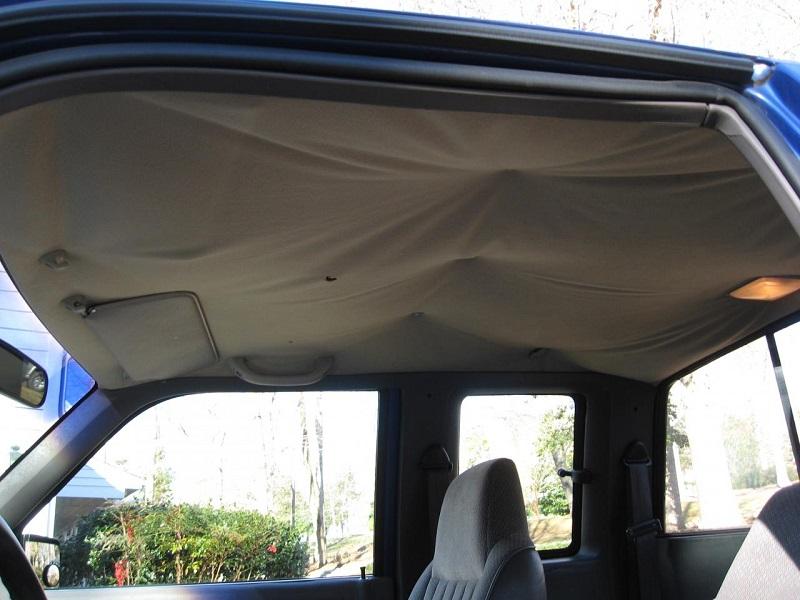
The car roof lining is an essential part of the interior of your car. It not only provides a clean and finished look but also helps to insulate the cabin, reducing noise and maintaining a comfortable temperature. Typically, car roof linings are made from a combination of fabric, foam, and adhesive materials, which are attached to the metal roof of the car.
Common Issues With Car Roof Lining
Over time, car roof linings can develop various issues due to wear and tear or prolonged exposure to heat and moisture. Some common problems that you may encounter include:
- Sagging: The car roof lining may start to sag, creating an unsightly appearance and reducing headroom.
- Peeling: The adhesive holding the car roof lining in place may weaken, causing the material to peel away from the roof.
- Wrinkling: Wrinkles or folds may form in the car roof lining, giving it a sloppy and unappealing look.
- Stains and discoloration: Over time, the fabric surfaces of the car roof lining can accumulate stains or become discolored, spoiling the overall aesthetic.
- Tearing: Heavy use or mishandling can result in tears or holes in the car roof lining material.
Why Should You Fix It Without Removing?
While traditional methods for fixing car roof lining involve removing the entire lining, it can be a time-consuming and expensive process. However, there is a way to fix your car roof lining without going through the hassle of removing it completely.
By using adhesive products specifically designed for car roof linings, you can easily reattach the sagging or detached sections without removing the entire lining. This method not only saves time and money but also allows you to maintain the original look and feel of your car interior. It’s a convenient solution that can be done at home with basic tools and minimal effort.

Credit: carfromjapan.com
Methods To Fix Car Roof Lining Without Removing
The car roof lining, also known as the headliner, provides insulation and enhances the overall aesthetic appeal of your vehicle’s interior. Over time, it may start sagging or become damaged, which can be quite unsightly. While some may opt for professional assistance or consider removing the headliner entirely, there are methods to fix car roof lining without removing that are more cost-effective and less time-consuming. In this article, we will explore three such methods that you can try yourself.
Using Adhesive Spray And Fabric Glue
If you prefer a simple and hassle-free solution, using adhesive spray and fabric glue can be a reliable method to fix your car’s roof lining. Here’s how you can do it:
- Clean the area around the sagging headliner to remove any dust or debris.
- Locate the sagging portions of the headliner and mark them for easy identification.
- Apply adhesive spray generously on both the headliner fabric and the roof surface.
- Press the sagging fabric firmly against the roof surface, starting from the edges and working your way towards the center.
- Allow the adhesive to dry as per the manufacturer’s instructions.
- For extra reinforcement, apply fabric glue along the edges of the headliner, ensuring a secure bond between the fabric and the roof surface.
This method provides a reliable solution that can help restore your car’s roof lining without the need for removal.
Using A Fabric Adhesive Tape
If you’re looking for a quick fix that requires minimal effort, using a fabric adhesive tape can be a suitable option. Follow these steps to fix your car’s sagging headliner:
- Identify the sagging areas of the headliner and mark them for reference.
- Clean the marked areas to ensure better adhesion.
- Cut the fabric adhesive tape into strips, allowing them to match the length of the sagging sections.
- Peel off the adhesive backing from the tape and carefully apply it along the edges of the sagging fabric, pressing firmly to secure it in place.
- Repeat the process for all marked sections, ensuring the fabric adhesive tape covers the entire sagging area.
Using a fabric adhesive tape is a convenient method to fix your car’s sagging roof lining, providing a temporary yet effective solution.
Using A Heat Gun And Adhesive
If you want a more permanent fix for your car’s sagging headliner, using a heat gun and adhesive can offer a reliable solution. Here’s how you can proceed:
- Ensure proper ventilation in the area where you’ll be working with the heat gun.
- Clean the sagging fabric and the area around it to remove any dirt or residue.
- Warm up the heat gun and carefully heat the sagging fabric, using a gentle back-and-forth motion.
- As the fabric becomes pliable, apply adhesive to the backside of the sagging fabric and the corresponding area on the roof surface.
- Press the sagging fabric against the heated and adhesive-coated roof surface, using a roller to ensure proper bonding.
- Allow the adhesive to dry completely before putting any pressure on the repaired area.
This method provides a long-lasting fix for your sagging headliner, ensuring a secure and visually appealing roof lining.
Step-by-step Guide
If your car’s roof lining is sagging or has become detached, it can be quite an eyesore and negatively impact your driving experience. While many people assume that fixing a car roof lining requires removing the entire headliner, it is possible to repair it without taking such drastic measures. In this step-by-step guide, we will walk you through the process of fixing your car’s roof lining without having to remove the headliner.
Preparing The Car Interior
Before you begin fixing the car roof lining, it’s important to gather the necessary tools and create a clean workspace. Here’s what you’ll need to have on hand:
- A flathead screwdriver
- A fabric adhesive suitable for automotive use
- A brush or roller for applying the adhesive
- A clean cloth
- A work light or flashlight, if needed for visibility
- A set of gloves to protect your hands
Once you have your tools ready, park your car in a well-ventilated area or outside, ensuring you have enough space to move around the vehicle comfortably. Open all the car doors and windows to allow for air circulation.
Removing Loose Lining Material
Before you can reattach the roof lining, you’ll need to remove any loose or hanging material. Gently pry off any trim or molding that may be covering the edges of the lining, using a flathead screwdriver or your fingers.
Next, carefully peel back any loose lining material, starting from the edges and working your way towards the center. Remove as much of the loose material as possible, being careful not to damage the remaining lining or headliner underneath.
Applying Adhesive And Attaching The Lining
Now that you’ve prepared the interior and removed the loose lining material, it’s time to apply the adhesive and reattach the lining. Following the manufacturer’s instructions, apply the fabric adhesive evenly to the surface of the headliner and the back of the lining fabric.
Start from one edge and carefully press the lining fabric onto the adhesive, working your way towards the other edge. Smooth out any wrinkles or air bubbles as you go, using a clean cloth or your gloved hand. Apply gentle pressure to ensure a secure bond between the lining fabric and the headliner.
Smoothing Out The Fabric
Once the lining fabric is attached to the headliner, it’s important to smooth out any imperfections and ensure a neat appearance. Use your gloved hand or a clean cloth to gently smooth the fabric, pressing out any wrinkles or uneven areas. Pay attention to the corners and edges, ensuring they are properly adhered and neatly folded.
Allowing The Adhesive To Dry
After smoothing out the fabric, allow the adhesive to dry according to the manufacturer’s instructions. This typically takes a few hours, but it’s best to leave it overnight for optimal results. Avoid touching or putting pressure on the repaired area while the adhesive is drying to ensure a strong and lasting bond.
Once the adhesive is completely dry, your car’s roof lining should be securely fixed without removing the headliner. Take a moment to step back and admire your handiwork, knowing that you have successfully restored your car’s interior to its former glory.
Tips And Precautions
When it comes to fixing car roof lining without removing it, it’s important to follow some tips and precautions to ensure a successful and safe repair. Whether you have noticed sagging or loose fabric on your car’s roof, addressing the issue promptly can help maintain the overall look and feel of your vehicle’s interior. In this section, we will discuss some essential tips and precautions you should keep in mind while fixing car roof lining without removing it.
Choosing The Right Adhesive
One of the first and most crucial steps in fixing car roof lining without removing it is selecting the right adhesive. The adhesive you choose should be specifically designed for vehicle interiors and capable of forming a strong bond between the lining fabric and the roof surface. It’s recommended to opt for an adhesive that is heat resistant and dries clear, as this will ensure a long-lasting and inconspicuous repair.
Additionally, before applying the adhesive, make sure to clean the roof surface thoroughly to remove any dirt, dust, or grease. This will help enhance the adhesive’s bonding ability, ensuring a more secure and durable fix.
Working In A Well-ventilated Area
Working in a well-ventilated area is another crucial precaution you should take while fixing car roof lining without removing it. Adhesive fumes can be harmful if inhaled in a confined space, so it’s important to choose a workspace with adequate airflow. Open windows or doors and use fans if necessary to ensure proper ventilation during the repair process.
Taking Necessary Safety Precautions
When undertaking any DIY project, safety should always be a top priority. Before starting the repair, make sure to wear appropriate personal protective equipment such as gloves and safety glasses to protect your hands and eyes. This will help prevent any potential injuries from adhesive or sharp tools that may be involved in the process.
In addition, ensure that you have a clean and clutter-free work area, reducing the risk of accidents or mishaps. Keep all tools and materials organized and within reach to facilitate a smooth and safe repair process.
By adhering to these essential tips and precautions, you can effectively fix your car’s roof lining without removing it, ensuring a professional-looking and long-lasting repair. Remember, always read and follow the instructions provided with your chosen adhesive for the best results.

Credit: www.youtube.com
Conclusion
Fixing car roof lining without removing it is a cost-effective and efficient solution. With the right tools and techniques, you can easily repair sagging or damaged headliners. By following the step-by-step instructions provided in this blog post, you can save time and money while restoring the appearance of your car’s interior.
Take action today and give your vehicle a fresh, new look without the hassle of removing the roof lining.