Ready to give your RC car a stunning new look that’ll turn heads at the track? Painting your RC car body is a great way to personalize your ride and express your creativity. But before you grab the nearest can of spray paint, there are a few things you need to know.
In this blog post, we’ll walk you through the entire process of painting your RC car body, from choosing the right paints to applying the final finishing touches. We’ll also cover some helpful tips and tricks to ensure your paint job is smooth, durable, and looks amazing.
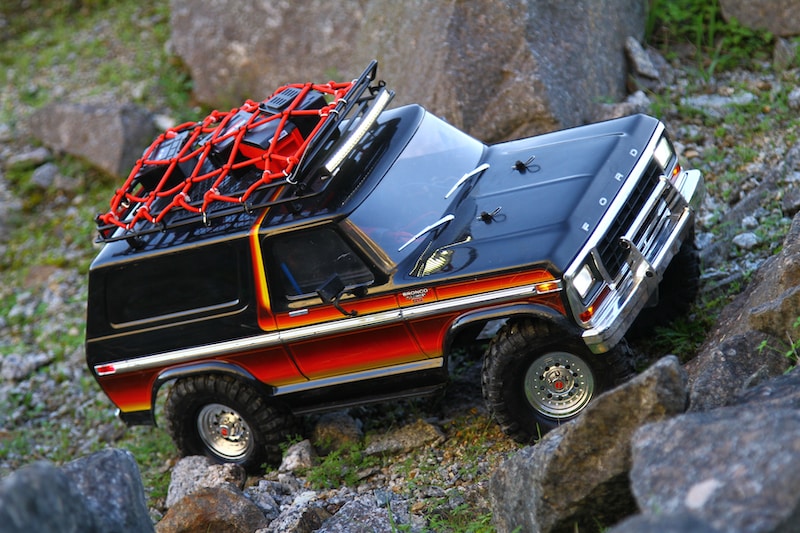
Preparing The Rc Car Body
Preparing the RC car body is a crucial step that sets the foundation for a flawless paint job. Regardless of whether you’re a novice or an experienced hobbyist, the right preparation techniques are key to achieving professional-looking results. In this section, we’ll discuss the important steps to take before getting your paintbrushes out.
Choosing The Right Body
When it comes to RC car bodies, there are a plethora of options available, each offering unique designs and styles. Before starting the painting process, it’s important to choose a body that suits your preferences and complements the overall theme of your RC car. Whether you prefer a sleek, modern look or a more rugged and off-road appearance, there’s a body out there that will match your vision.
Consider factors such as the body shape, size, and compatibility with your RC car model. Take your time browsing through different options and check for customer reviews to ensure durability and quality. Once you’ve found the perfect body, you can move on to the next step in the preparation process.
Cleaning And Sanding The Body
Before applying any paint, it’s crucial to clean the RC car body thoroughly. Use a mild detergent or specifically formulated RC car body cleaner to remove any dirt, grease, or residue. This step ensures that the paint has a smooth surface to adhere to, preventing any imperfections or unevenness.
Once the body is clean and dry, it’s time to sand it. Sanding helps to smooth out any rough surfaces, imperfections, or uneven edges. Start with a low grit sandpaper (around 200 to 400) to tackle any major imperfections, gradually working your way up to a finer grit (around 800 to 1200) for a smooth finish.
Remember to be gentle while sanding and avoid applying excessive pressure, as this can damage the body. After sanding, wipe away any dust or debris using a microfiber cloth to ensure a pristine surface for painting.
Masking Off Areas
Masking off areas is an essential step in achieving clean and defined lines in your RC car body paint job. Use high-quality masking tape to cover the areas that you don’t want to be painted, such as windows, logos, or decals. This technique ensures that the paint only goes where you want it to, avoiding any overspray or accidental paint marks.
Carefully apply the masking tape along the edges, making sure it adheres firmly to the body. Take your time to ensure that all the desired areas are properly covered, as any gaps can result in unwanted paint coverage. It’s also recommended to use masking paper or plastic sheets to protect larger areas from overspray.
With these essential steps completed, you’ve successfully prepared your RC car body for painting. Stay tuned for the next section, where we’ll dive into the exciting world of painting techniques and tips!
Priming And Paint Techniques
When it comes to painting your RC car body, proper priming and painting techniques are crucial for achieving a professional and long-lasting finish. In this section, we will discuss the key steps involved in priming the body and selecting the right paint for your RC car.
Selecting The Right Primer
Before you start painting, it’s essential to select the right primer for your RC car body. A primer not only helps the paint adhere to the surface but also improves its durability and resistance to scratches and chips.
There are various types of primers available, including plastic primers, metal primers, and high-fill primers. When choosing a primer, consider the type of material your RC car body is made of. For plastic bodies, opt for a plastic primer that is designed specifically for plastics. If your RC car body is made of metal, choose a metal primer to ensure proper adhesion of the paint.
Applying The Primer
Applying the primer correctly is essential for a smooth and even paint finish. Here’s a step-by-step guide on how to apply primer to your RC car body:
- Ensure the body is clean and free of any dirt or debris. Use a mild soap and water solution to clean the surface thoroughly.
- Scuff the body surface lightly with fine-grit sandpaper. This helps the primer adhere better to the surface.
- Apply the primer in thin, even coats. Hold the spray can about 8-10 inches away from the body and apply short, sweeping motions, overlapping each stroke slightly.
- Allow the primer to dry completely between coats. Follow the manufacturer’s instructions for drying time.
- Repeat the process until the body is fully covered with primer. Let the final coat dry for the recommended time.
Choosing The Right Paint
Once the primer has dried, it’s time to select the right paint for your RC car body. The paint you choose should be compatible with the primer and suitable for the type of material your RC car body is made of.
For plastic bodies, choose a paint that is specifically formulated for plastic surfaces. If your RC car body is made of metal, opt for a paint that is designed for metal surfaces. Consider using durable and high-quality paints for better resistance to fading, chipping, and scratching.
Techniques For Painting The Body
Now that you have selected the right paint, it’s time to paint the RC car body. Here are some techniques to ensure a smooth and professional-looking finish:
- Start by applying light coats of paint. Building up the color gradually prevents drips and ensures an even finish.
- Hold the spray can about 8-10 inches away from the body and apply the paint using smooth, sweeping motions.
- Overlap each stroke slightly to ensure complete coverage.
- Allow each coat to dry completely before applying the next one. This helps prevent smudging or streaking of the paint.
- For more intricate details or designs, use masking tape to create clean lines and protect areas that should not be painted.
By following these priming and painting techniques, you can achieve a professional-looking paint job on your RC car body. Take your time, be patient, and enjoy the process of customizing your RC car to make it truly unique.
Adding Customization And Details
When it comes to painting your RC car body, the sky’s the limit when it comes to customization and adding details. From adding decals and stickers to airbrushing intricate designs, there are endless possibilities to make your RC car truly unique. In this section, we will explore some popular methods of customization that will make your RC car stand out from the rest.
Using Decals And Stickers
One of the easiest ways to add customization and details to your RC car body is by using decals and stickers. These come in a wide variety of designs, colors, and sizes, allowing you to personalize your RC car according to your taste. Whether you prefer a sleek racing look or a vibrant graphic design, decals and stickers can give your RC car the desired appearance.
Here are some tips on using decals and stickers:
- Start by cleaning the surface of your RC car body to ensure proper adhesion. Remove any dirt, oils, or debris.
- Choose the right size and shape of the decal or sticker that will fit your RC car body perfectly.
- Use a tweezer or a small, pointed tool to carefully apply the decal or sticker onto the desired location. Start from one edge and slowly press it down, smoothing out any air bubbles or wrinkles.
- If you make a mistake, don’t worry! Decals and stickers are usually removable, allowing you to reposition them or remove them completely without damaging the paint job.
- Apply a clear coat or sealant over the decals or stickers to protect them from peeling or fading over time.
Airbrushing And Detailing
Airbrushing is a popular technique among RC car enthusiasts to achieve highly detailed and professional-looking paint jobs. It allows you to create gradients, shading, and fine details that are hard to achieve with other methods. Here’s how to get started with airbrushing:
- Choose an airbrush kit that suits your needs and budget. There are a variety of airbrushes available, ranging from beginner-friendly models to more advanced ones.
- Prepare your RC car body by cleaning it thoroughly and applying a primer coat for better adhesion.
- Select the desired colors for your design and thin them to the appropriate consistency using airbrush thinner.
- Practice on a scrap surface before painting your RC car body. This will help you get familiar with the airbrush and adjust the air pressure and paint flow according to your needs.
- Start painting your RC car body by gradually building up layers of paint, adding details and gradients as you go. Take your time and work in thin layers to achieve a smooth and even finish.
- Once you are satisfied with the paint job, allow it to dry completely before applying a clear coat to protect the design.
Creating Patterns And Effects
For those looking to take their RC car body painting to the next level, creating patterns and effects can add a striking visual appeal. Here are some techniques you can try:
| Technique | Description |
|---|---|
| Masking | Use masking tape or vinyl masks to create sharp lines, geometric shapes, or intricate designs. Apply different colors in sections and remove the masks to reveal the pattern. |
| Splatter effect | Load your airbrush with thinned paint and flick the bristles of a paintbrush or toothbrush to create a splatter effect. Experiment with different colors and distances for a unique look. |
| Stenciling | Use stencils to overlay designs onto your RC car body. This can include flames, lightning bolts, or any other pattern you desire. Remember to secure the stencil in place with masking tape and use a gentle dabbing motion with your airbrush. |
By utilizing these techniques and experimenting with different colors and patterns, you can create a truly eye-catching RC car body that reflects your style and creativity.
Finishing Touches And Protection
Give your RC car body a flawless finish with these essential tips on how to paint it. Protect it from scratches and add those finishing touches to make it stand out on the track. Perfect for RC car enthusiasts!
Applying Clear Coat
Once you have finished painting your RC car body, it’s time to apply a clear coat to give it a glossy and professional-looking finish. The clear coat not only adds shine but also provides a protective layer for the paint underneath, preventing it from chipping or fading easily.
To apply the clear coat, you will need:
- A high-quality automotive clear coat spray
- A well-ventilated area or a spray booth
- Painter’s tape to mask off any areas you don’t want to clear coat
- Sandpaper (optional) for smoothing out any imperfections before applying the clear coat
Here’s a step-by-step guide on applying clear coat:
- Clean the painted body thoroughly to remove any dust or debris. Use a mild soap and water solution, gently scrubbing the surface with a soft cloth or sponge. Rinse it off and let it dry completely.
- If there are any imperfections or rough spots on the painted surface, sand them down with fine-grit sandpaper until smooth. Be careful not to sand through the paint.
- Mask off any areas you don’t want to clear coat, such as windows or decals, using painter’s tape.
- Shake the clear coat spray can vigorously for a few minutes to ensure proper mixing of the clear coat.
- Hold the can about 8-12 inches away from the body, and apply an even, light coat of clear coat in smooth, overlapping strokes. Start from one end and work your way to the other, making sure to cover the entire surface. Avoid spraying too close or too heavily, as it can cause drips or runs.
- Let the first coat dry for the recommended time mentioned on the clear coat can. It typically takes around 10-15 minutes. Apply additional coats as necessary, following the same technique, until you achieve the desired level of glossiness.
- Once you have finished applying all the coats, let the clear coat cure for the recommended time mentioned on the can. This is usually 24-48 hours, but it’s important to check the specific instructions for the clear coat you are using.
- After the clear coat has cured completely, carefully remove the painter’s tape to reveal clean lines.
Polishing And Waxing
Polishing and waxing your RC car body after applying the clear coat is the final step to achieve that showroom shine. Polishing helps to remove any minor imperfections, such as swirl marks or light scratches, while waxing adds an extra layer of protection and enhances the shine.
Here’s how to polish and wax your RC car body:
- Start by using a polishing compound and a soft microfiber cloth. Apply a small amount of polishing compound to the cloth and gently rub it onto the body in circular motions. Continue polishing until you see the imperfections disappear or become less noticeable.
- Once you are satisfied with the polish, remove any residue using a clean microfiber cloth.
- Next, apply a thin layer of car wax to the body using a wax applicator pad or a clean cloth. Again, work in circular motions, ensuring thorough coverage.
- Allow the wax to dry on the body for the recommended time mentioned on the product’s packaging.
- Finally, using a clean microfiber cloth, buff the waxed surface in circular motions to bring out the shine.
Protecting The Paint Job
Once you have put all the effort into painting, clear coating, polishing, and waxing your RC car body, it’s important to protect your hard work to ensure it stays looking great for longer.
Here are some tips to protect your paint job:
- Store your RC car in a protective case or bag when not in use to prevent dust and scratches.
- Avoid exposing your RC car to extreme temperatures, direct sunlight, or harsh chemicals, as these can cause the paint to fade or peel.
- Regularly clean your RC car body with a mild soap and water solution, and dry it thoroughly to remove any dirt or debris.
- Consider using a car paint protectant or detailing spray to add an extra layer of protection and keep your paint looking vibrant.
- Inspect your RC car body periodically for any signs of damage or wear. Touch up any chips or scratches immediately to prevent further damage.
By following these steps and properly taking care of your RC car body, you can enjoy a beautifully painted and protected masterpiece that stands out on the track or display shelf for years to come.
Final Words
Painting your RC car body can be a fun and creative way to personalize your vehicle. By following the steps mentioned in this blog post, you can achieve professional-looking results. Remember to prepare the body, choose the right paint and tools, practice proper painting techniques, and apply a clear coat for added protection.
With a little patience and attention to detail, you’ll be able to create a unique and eye-catching design. Happy painting!


