If you’re the proud owner of a car with leather seats, you probably know how luxurious and stylish they look. But let’s face it – leather seats are prone to wear and tear. Whether it’s the occasional scratch, a tear, or just general fading from exposure to sunlight, leather can start looking a bit tired. But don’t worry! With the right techniques, you can easily restore and fix your leather car seats to make them look as good as new. So grab your favorite music, a cup of coffee, and let’s dive into these 7 simple ways to fix leather car seats.
Why Fixing Leather Seats is a Good Idea
Before we jump into the fixes, let’s talk about why it’s a great idea to care for your leather car seats. First off, leather seats can be pretty pricey to replace or reupholster, so fixing them is a much more affordable option. Plus, leather is much easier to clean and maintain than cloth seats, and with proper care, it can last for many years.
Another great reason to fix leather seats is that it will boost your car’s overall appearance. If you’re planning to sell your car, having clean, well-maintained leather seats can help you get a better price. A quick fix can prevent those minor issues from turning into bigger, more costly problems.
Now, let’s get into how you can fix your leather seats with minimal effort, using affordable products you likely already have at home or can easily find at the store.
1. Cleaning Leather Seats Properly: The Foundation of Fixing Them
Why Cleaning Matters
The first step to fixing leather seats is making sure they’re clean. Leather collects dirt, dust, and oils from your skin. If left untreated, these particles can cause stains, fading, or even cracking. Cleaning your leather seats is the foundation of every other fix, so it’s important to get this right.
Materials You’ll Need:
- A vacuum with a soft brush attachment
- Microfiber cloths
- Leather cleaner or mild soap (such as dish soap)
- A bucket of warm water
- Soft brush
The Cleaning Process:
Start by using the vacuum to remove loose dirt and debris from your seats. Pay special attention to the seams where dirt tends to hide. Once you’ve vacuumed, mix a small amount of mild soap in warm water. Dip the microfiber cloth into the solution, wring it out so it’s damp (not soaking wet), and gently wipe down the seats.
Next, use a soft brush to scrub any spots with built-up grime. A toothbrush works wonders for getting into the cracks and crevices. After you’ve cleaned the seats, use a dry microfiber cloth to wipe off any excess moisture.
You don’t want to leave any water sitting on the leather, as it can cause it to dry out and crack over time. And just like that, your seats will look fresh and clean, setting the stage for the next steps.
2. Fixing Scratches and Scuffs
Identifying the Damage
Leather seats are known for their smooth, shiny finish, but they’re not invincible. Scratches and scuffs from keys, belts, or even pets can quickly ruin that beautiful look. But don’t stress – most scratches can be fixed with a little care and the right tools.
Materials You’ll Need:
- Leather conditioner or repair kit
- Leather paint (if needed)
- Cotton swabs or a soft cloth
The Fixing Process:
To start, apply a small amount of leather conditioner to a clean cloth, and gently rub it into the scratched area. Leather conditioner will not only hydrate the leather but also help to mask light scratches. After you’ve rubbed it in, allow it to dry for a few minutes, then buff it gently with a dry cloth.
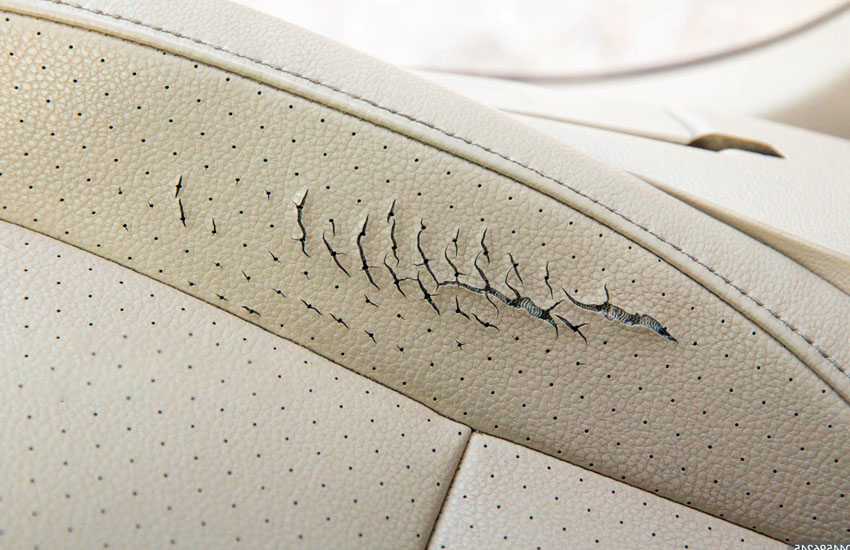
If the scratches are deeper, you can use a leather repair kit. These kits usually include a filler that you can apply to the damaged area. Be sure to follow the instructions carefully. Once the filler is applied, you can gently smooth it out using a small spatula or your fingers.
For more significant scuffs, leather paint may be required to restore the original color. Choose a paint that matches your car’s seat color. Apply it carefully using a cotton swab, and let it dry completely before buffing it to a smooth finish.
3. Repairing Leather Tears or Holes
Why You Need to Act Fast
Leather tears or holes are no fun to deal with, but they can often be repaired without having to replace the entire seat. If you catch the damage early, it’s much easier to fix.
Materials You’ll Need:
- Leather repair kit
- Leather glue or adhesive
- Leather patch (optional)
- A spatula
The Repair Process:
Start by cleaning the tear or hole area thoroughly with a damp cloth to remove any dust and dirt. If the hole is large, consider using a leather patch. Leather repair kits usually include a patch that can be inserted behind the tear, providing support while you apply adhesive.
Use the spatula provided in your repair kit to spread a thin layer of leather adhesive around the edges of the tear. Carefully press the two sides together and allow it to dry for the recommended time.
For a more advanced fix, apply a filler to smooth over the tear, followed by leather paint to restore the color. Be sure to let each layer dry completely before applying the next. This method can be used for both minor and more significant tears, leaving your seats looking like new again.
4. Preventing Leather Fading with Proper Care
Why Leather Fades
Leather can fade over time, especially if exposed to direct sunlight for long periods. Fading occurs when the natural oils in the leather dry out, leaving the material looking dull and worn. Fortunately, there are simple ways to prevent and fix this issue.
Materials You’ll Need:
- Leather conditioner
- UV protectant for leather
- Microfiber cloth
The Prevention Process:
The first step in preventing fading is to regularly condition your leather seats. Leather conditioner helps to replenish the natural oils and keep the leather supple. Apply the conditioner generously to a clean microfiber cloth, and rub it into the seats in circular motions.
Next, use a UV protectant specifically designed for leather. These products help shield your seats from the harmful effects of sunlight, which can cause the leather to crack and fade. Apply the protectant once every few months for best results.
Finally, consider using sunshades or window tinting to protect your seats from the sun while your car is parked. It’s a small investment that can go a long way in preserving the quality of your leather seats.
5. Removing Stubborn Stains from Leather Seats
What Causes Stains?
Leather seats can easily stain, especially if you’re eating or drinking in your car. Common culprits include coffee, ink, grease, and makeup. Luckily, with the right technique, you can remove these stains without damaging the leather.
Materials You’ll Need:
- Leather cleaner or rubbing alcohol
- Microfiber cloth
- Cotton swabs
The Stain Removal Process:
To remove stains from leather, start by testing your cleaning solution on a small, hidden area of the seat to ensure it doesn’t cause discoloration. If the test goes well, dampen a cloth with your leather cleaner or rubbing alcohol, and gently rub it over the stained area.
For stubborn stains, use a cotton swab to apply the cleaner directly to the stain. Be patient, as it may take several attempts to completely remove the stain. Once the stain is gone, wipe the area with a clean, dry cloth and apply a leather conditioner to restore moisture.
6. Restoring Shine to Dull Leather Seats
Why Leather Loses Its Shine
Over time, leather seats can lose their shiny appearance, becoming dull and lackluster. This happens because the oils in the leather are depleted due to use, exposure to sunlight, and general wear. Thankfully, you can easily restore the shine without much effort.
Materials You’ll Need:
- Leather conditioner
- Soft cloth
- Leather polish (optional)
The Shine Restoration Process:
Start by cleaning the seats thoroughly, as any dust or dirt will interfere with the shine. Apply a generous amount of leather conditioner to a soft cloth, and rub it into the leather in circular motions. This will restore moisture to the material and bring back its natural shine.
For an added layer of protection and a glossier finish, you can use a leather polish after conditioning the seats. Make sure to buff it gently to avoid creating streaks.
7. Maintaining Leather Seats for the Long Run
Why Regular Maintenance is Key
Keeping your leather seats in top condition is all about regular maintenance. By following a few simple steps on a routine basis, you can extend the life of your seats and keep them looking as good as the day you got your car.
Materials You’ll Need:
- Leather cleaner
- Leather conditioner
- UV protectant
The Maintenance Process:
Set a schedule to clean and condition your leather seats at least once every few months. Use a leather cleaner to remove dirt and oils, and follow up with a conditioner to keep the leather soft and supple. Don’t forget to use a UV protectant to shield your seats from the harmful effects of sunlight.
By regularly maintaining your leather seats, you’ll avoid the need for major repairs down the road and keep your car interior looking luxurious.
Are These Questions in Your Mind?
Is it okay to use regular soap to clean leather car seats?
Using regular soap isn’t ideal because it can be too harsh for leather. Stick to a mild, pH-balanced soap or a cleaner specifically designed for leather.
Can leather seats be fixed if they are cracked?
Yes, minor cracks can be repaired using a leather conditioner or a repair kit. Deeper cracks may require more extensive repairs, but they are still fixable.
Do I need to condition my leather seats regularly?
Yes, conditioning your leather seats every few months helps maintain their softness and prevents cracking or fading.
Is it safe to use leather repair kits?
Yes, leather repair kits are designed specifically for this purpose. Just make sure to follow the instructions carefully.
Can I use household cleaners on leather?
It’s best to avoid using harsh household cleaners on leather as they can strip away oils and damage the material. Stick to cleaners made for leather.
Do I need a professional to repair my leather seats?
You can handle most minor repairs yourself with the right tools, but for larger issues, a professional may be necessary.
Is it better to replace leather seats or repair them?
Repairing leather seats is often more affordable and effective, especially for minor issues. Replacing them should only be necessary for extensive damage.
Can leather seats get too old to repair?
Leather seats can be repaired at any age, but severe damage may require professional restoration or reupholstery.
Do I need to be careful when using a leather repair kit?
Yes, always follow the instructions and test the repair products on a hidden area first to ensure they won’t cause discoloration or damage.
Is it hard to fix a tear in leather car seats?
Fixing a tear is simple with the right repair kit. If the tear is deep, it might take more effort, but it can still be repaired.
I hope this guide helps you restore and maintain your leather car seats, making your car interior look and feel luxurious again. Whether you’re fixing minor scratches or tackling deeper repairs, these easy methods will save you time and money, and leave you with seats that look like new.


