To drain Freon from a car, you will need to use a certified recovery machine or take it to a licensed professional. Looking to drain Freon from your car?
Whether you need to replace the air conditioning system or handle a refrigerant leak, it’s important to know how to properly drain Freon from your vehicle. In this guide, we will walk you through the steps involved in safely removing the refrigerant.
Remember, it’s crucial to follow the necessary precautions and regulations to protect both yourself and the environment. So, read on to learn the correct method for draining Freon from your car’s air conditioning system.

Credit: www.bridwellautocenter.com
Step 1: Gather The Necessary Equipment
Before you begin the process of draining Freon from your car’s air conditioning system, it is important to ensure that you have all the necessary equipment. This will not only make the task easier but also help maintain your safety throughout the process. In this step, we will cover three key pieces of equipment: protective gear, a recovery machine, and a refrigerant recovery tank. Let’s dive in and understand each one in detail.
Protective Gear
Wearing the right protective gear is essential when working with air conditioning systems and Freon. It not only safeguards you from any potential leaks but also minimizes the risk of inhaling harmful chemicals. The following protective gear is recommended:
- A pair of safety goggles
- Chemical-resistant gloves
- A long-sleeved shirt or jacket
- Long pants
- Closed-toe shoes
- An apron
- A respirator mask or a ventilator mask for better protection
Ensure that all parts of your body that may come into contact with Freon or other chemicals are adequately covered. This will help mitigate any potential hazards while draining the Freon from your car’s air conditioning system.
Recovery Machine
A recovery machine is a crucial piece of equipment when it comes to draining Freon from your car. It helps in the safe removal and collection of the refrigerant from the air conditioning system. Ensure that you have a reliable recovery machine that is specifically designed for automotive use. This machine will effectively extract the Freon, preventing it from being released into the environment and causing harm.
Refrigerant Recovery Tank
A refrigerant recovery tank is used to store the extracted Freon from your car’s system. It is important to have a properly labeled and approved refrigerant recovery tank that complies with environmental regulations. The tank should have a capacity appropriate for the amount of Freon you expect to drain from your car’s air conditioning system.
Remember, handling Freon can be hazardous if not done correctly. Therefore, having the correct protective gear, an efficient recovery machine, and a suitable refrigerant recovery tank is imperative to ensure your safety and proper handling of the refrigerant. Once you have gathered all the necessary equipment, you are ready to move on to the next steps of draining Freon from your car’s air conditioning system.
Step 2: Prepare The Work Area
Before proceeding with draining the Freon from your car, it is crucial to prepare the work area properly. This will ensure not only your safety but also the effectiveness of the procedure. It involves choosing a well-ventilated area and clearing the area of any flammable materials.
Choose A Well-ventilated Area
When draining Freon, it is essential to choose a well-ventilated area. This will help prevent the accumulation of harmful gases and ensure that you have plenty of fresh air circulating around you. Whether you are working in a garage or outdoors, make sure there is adequate ventilation.
Clear The Area Of Flammable Materials
Before getting started, carefully clear the work area of any flammable materials. This is crucial as working with Freon involves handling chemicals that can be hazardous if mishandled. Remove any items such as gasoline, aerosol cans, and other flammable substances from the immediate vicinity to eliminate any potential fire hazards.
If you are working in a garage, ensure that there are no oil spills or leakages nearby. These substances are highly flammable and can pose a significant risk during the draining process. By removing flammable materials, you can proceed with the confidence that your work area is safe and secure.
| Flammable Materials | Action Required |
|---|---|
| Gasoline | Remove from the area |
| Aerosol cans | Remove from the area |
| Oil spills or leakages | Ensure proper cleanup |
By adhering to these safety measures and preparing the work area correctly, you can ensure a smooth and risk-free process of draining Freon from your car. Now that you have chosen a well-ventilated area and cleared it of any flammable materials, you are ready to move on to the next step.
Step 3: Locate The A/c Service Ports
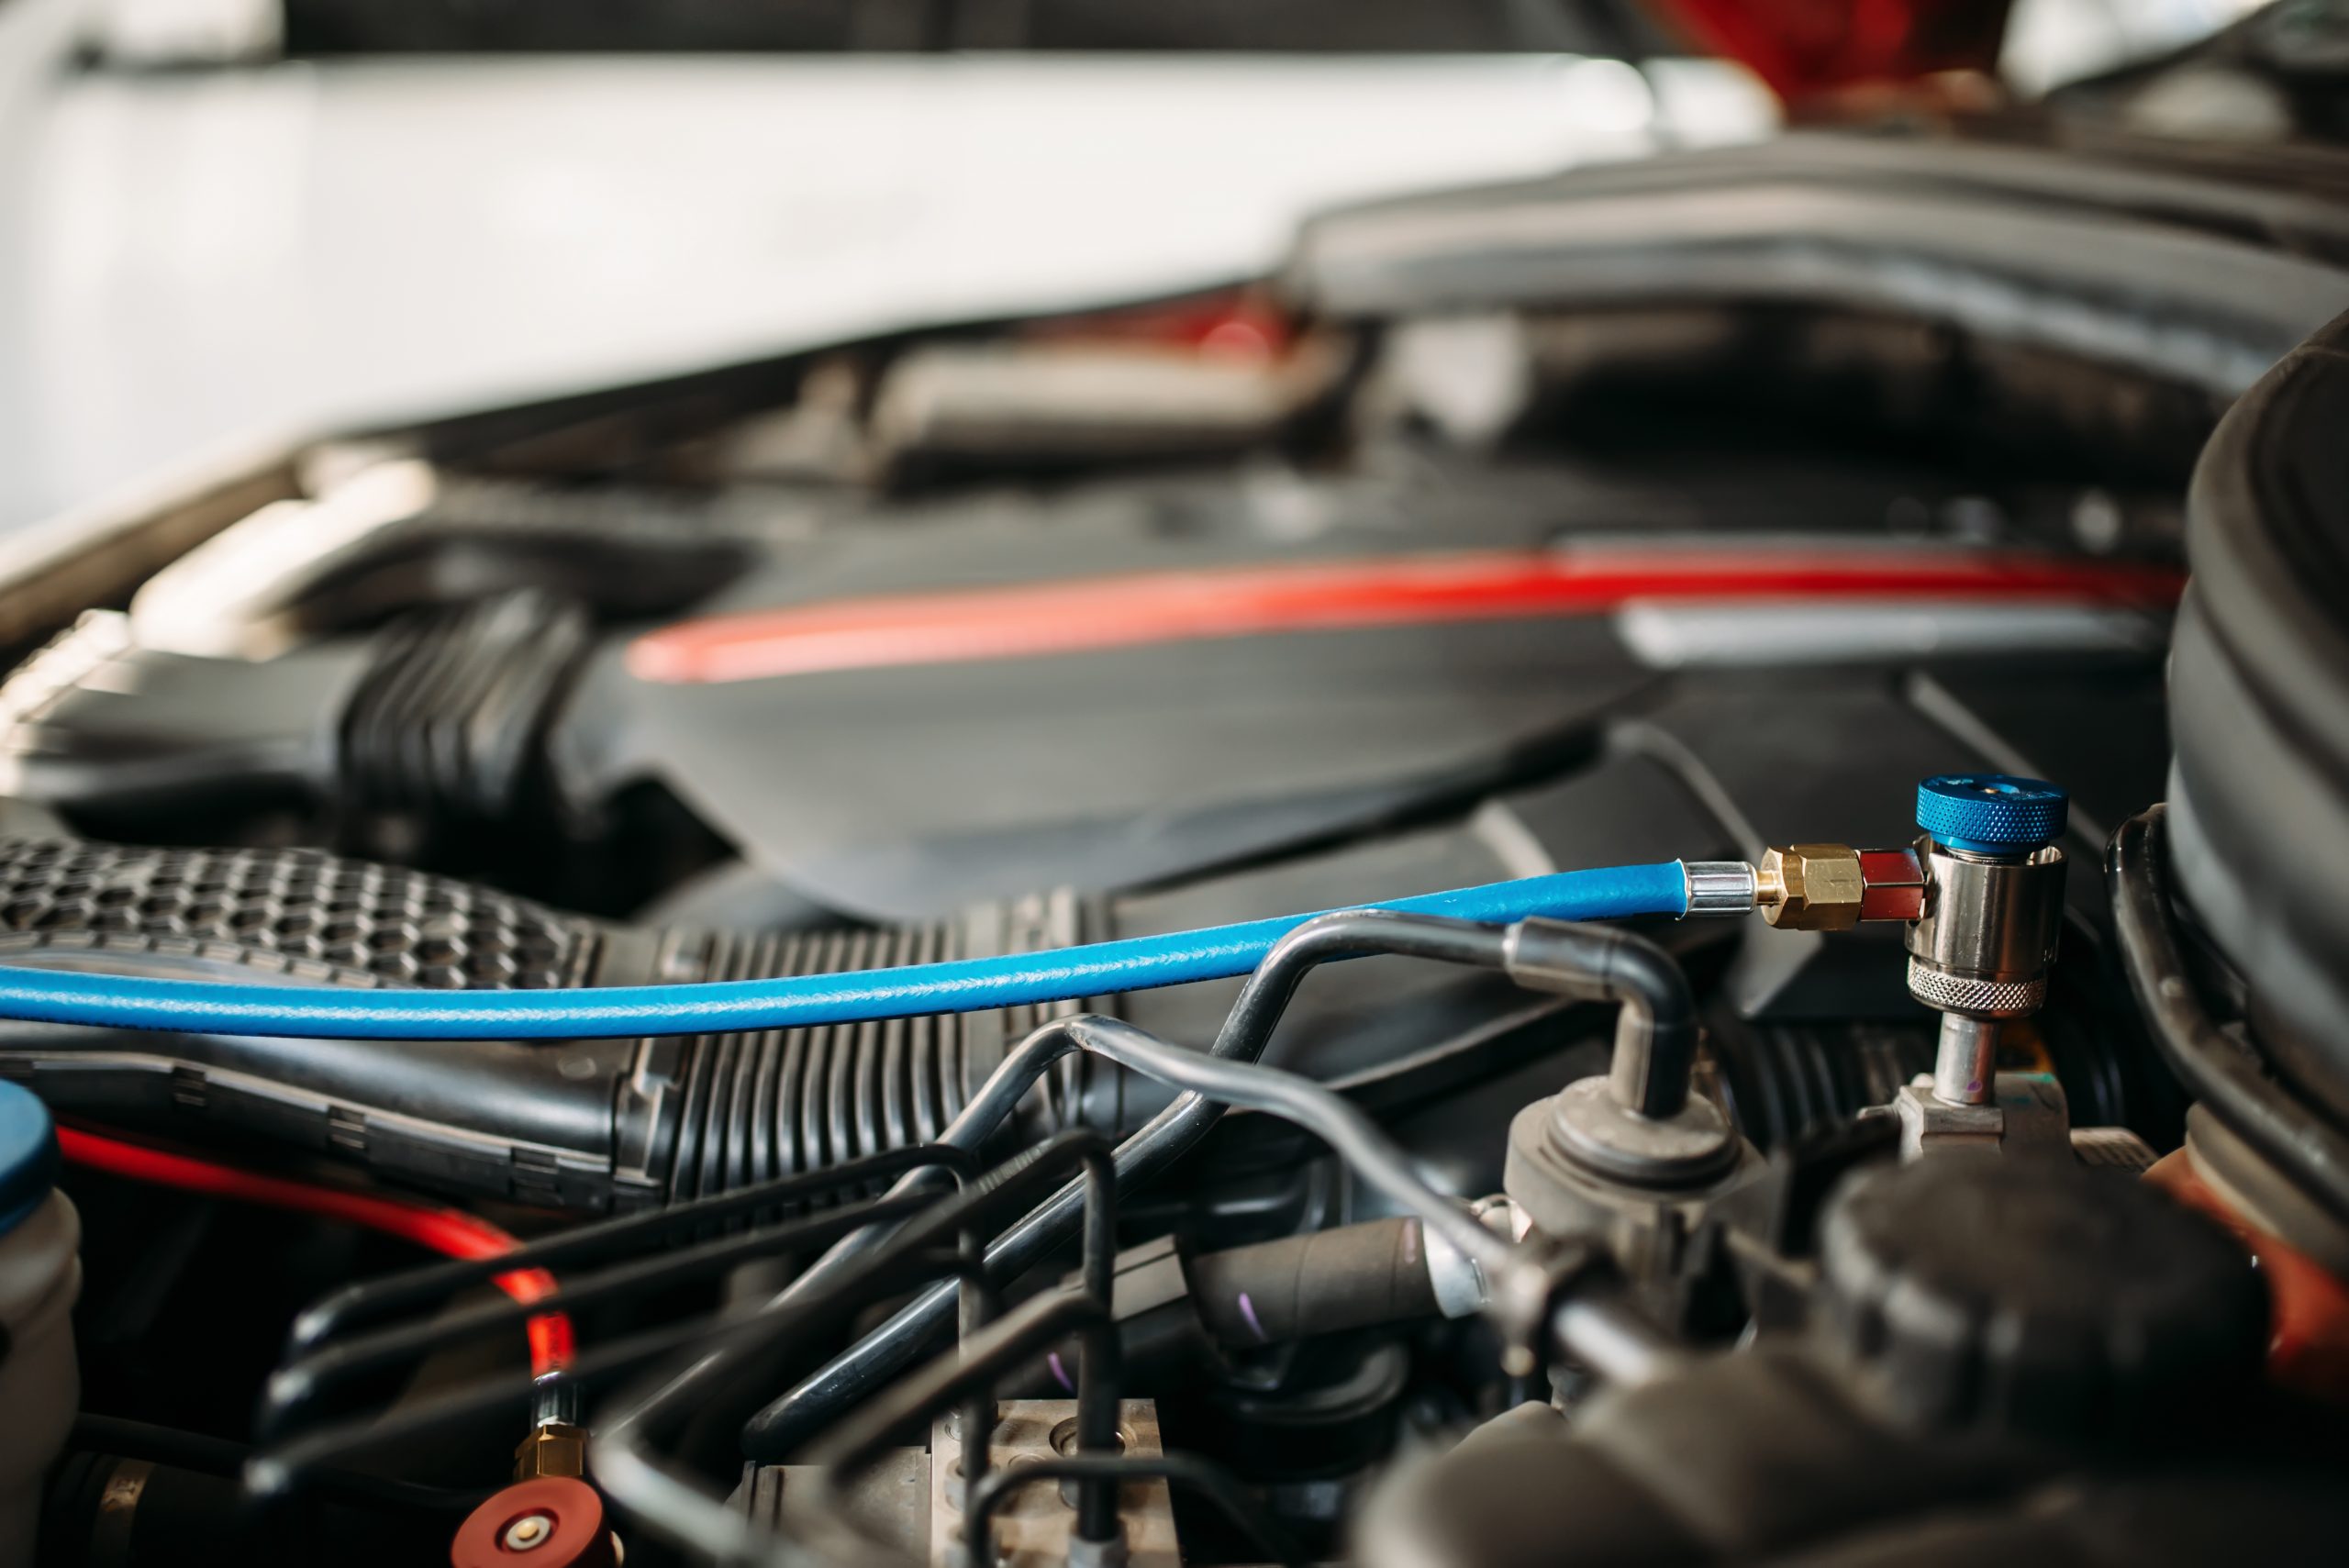
Locating the A/C service ports is an important step in draining Freon from your car. These ports can typically be found near the A/C compressor or in the engine bay, and they allow you to access the refrigerant system for proper disposal.
After gathering all the necessary tools and safety equipment, the next step in draining the Freon from your car’s A/C system is to locate the A/C service ports. These ports are where you will connect your A/C manifold gauge set and begin the evacuation process. Identifying the high-pressure and low-pressure ports is crucial in ensuring a successful Freon draining process.Identifying High-pressure And Low-pressure Ports
To locate the A/C service ports, you need to identify the high-pressure and low-pressure ports in your car’s A/C system. These ports are typically labeled with either an “H” for high or an “L” for low. If you are unable to locate these labels, consulting your car’s manual should provide you with the necessary information.Consulting The Car’s Manual
To ensure you find the correct A/C service ports, it is essential to consult your car’s manual. The manual will typically have a section dedicated to the A/C system, providing you with the precise location and labeling of the high-pressure and low-pressure ports. This step is crucial as connecting your A/C manifold gauge set to the wrong ports can result in damage to your A/C system or even injuries to yourself.Once you have identified the high-pressure and low-pressure ports, make sure to write them down or take a picture for future reference. This will help you avoid any confusion in the next steps of the Freon draining process.By following these steps and properly locating the A/C service ports, you are now ready to move on to the next stage of draining the Freon from your car’s A/C system. Stay tuned for the upcoming blog post section where we’ll discuss how to connect the A/C manifold gauge set and initiate the evacuation process.Step 4: Connect The Recovery Machine
In step 4 of the process on how to drain Freon from your car, you need to connect the recovery machine. This step is crucial for safely removing the refrigerant from the car’s system.
Now that you have prepared the car and gathered the necessary tools, it’s time to connect the recovery machine. This step is crucial in the freon draining process as it allows for the safe removal and storage of the refrigerant. Follow these substeps to ensure a proper connection.Attaching The Recovery Machine Hoses
The first step in connecting the recovery machine is to attach the hoses. These hoses are designed to transfer the refrigerant from the car’s A/C system to the recovery machine. Here’s how you can do it:- Locate the service ports on your car’s A/C system. These ports are typically labeled with an “L” for low pressure and “H” for high pressure. Refer to your car’s manual if you’re having trouble finding them.
- Connect the low-pressure hose from the recovery machine to the low-pressure service port. Make sure to tighten the connection securely to avoid any leaks.
- Next, connect the high-pressure hose from the recovery machine to the high-pressure service port. Again, tighten the connection properly.
- Check the connections one more time to ensure they are secure. Any loose connections can result in leaks and potentially hazardous situations.
Avoiding Cross-contamination
When connecting the recovery machine, it’s crucial to avoid cross-contamination of refrigerants. This can occur when different types of refrigerants mix, which can lead to damage in the recovery machine and even potential harm to the environment. Follow these steps to prevent cross-contamination:- Purge the hoses – Before connecting the recovery machine, it’s essential to purge the hoses to remove any remnants of previous refrigerants. This can be done by running the recovery machine for a few seconds with the hoses disconnected.
- Ensure the recovery machine is set to the correct refrigerant type – Make sure the recovery machine is properly set to handle the specific refrigerant type used in your car’s A/C system. This will ensure that the recovery machine functions correctly and prevents any mixing of refrigerants.
Securing Connections
To ensure a seamless and safe freon draining process, it’s crucial to secure the connections between the recovery machine and the car’s A/C system. Here are a few steps to help you with this:- Tighten the hose connections – Double-check that the hoses are securely attached to the service ports on your car’s A/C system. Use a wrench if necessary to ensure a tight connection.
- Inspect for leaks – Once the connections are secured, visually inspect the hoses and connections for any signs of leaks. Even a small leak can affect the efficiency of the freon draining process.
- Use zip ties or clamps – Consider using zip ties or clamps to provide additional support and ensure that the hoses stay securely connected throughout the draining process.
Step 5: Begin The Recovery Process
In step 5 of draining the freon from your car, you begin the recovery process. This crucial step ensures the safe and proper removal of the refrigerant, allowing you to proceed with other necessary repairs or maintenance tasks.
Once you have completed the process of evacuating the system, it is time to move on to the next step: the recovery process. This is an important part of draining Freon from your car, as it helps to safely remove the refrigerant from the system. In this step, you will be monitoring the recovery process to ensure everything goes smoothly. Follow the steps below to complete this step effectively.Evacuating The System
Before you can start the recovery process, it is essential to evacuate the system. This involves removing any remaining Freon or refrigerant from the car’s air conditioning system. To do this, follow these simple steps:- Make sure that all valves on the A/C manifold gauge set are closed.
- Connect the yellow hose to the center port of the manifold gauge set.
- Connect the blue hose to the low-pressure port of the A/C system.
- Open the low-pressure valve on the manifold gauge set.
- Turn on the vacuum pump and allow it to run for at least 30 minutes.
- After 30 minutes, close the low-pressure valve on the manifold gauge set and turn off the vacuum pump.
- Disconnect the blue hose from the low-pressure port.
Monitoring The Recovery Process
Once the system has been properly evacuated, you can begin the recovery process. This involves safely removing the Freon from the A/C system and transferring it to a recovery cylinder. Here’s how to monitor the recovery process:- Attach the recovery cylinder to the high-pressure port of the A/C system using the red hose.
- Open the high-pressure valve on the manifold gauge set.
- Turn on the A/C system, set it to the maximum cooling, and let it run until all the refrigerant has been recovered.
- Monitor the pressure readings on the manifold gauge set throughout the process.
- Once the pressure readings stabilize and the recovery cylinder is full, close the high-pressure valve on the manifold gauge set.
- Turn off the A/C system and disconnect the recovery cylinder from the high-pressure port.

Credit: www.aarp.org
Step 6: Dispose Of The Freon Properly
Proper disposal of Freon is a crucial step in draining it from a car. Ensure compliance with environmental regulations by disposing of Freon responsibly.
Proper disposal of the recovered Freon is crucial for both environmental and legal reasons. It is important to follow the correct procedures to ensure the safe handling and disposal of this hazardous substance. In this step, we will discuss two key aspects of proper disposal: transferring the recovered Freon to a refrigerant recovery tank and adhering to local regulations for disposal.Transfer The Recovered Freon To A Refrigerant Recovery Tank
Once the Freon is safely removed from your car, it needs to be transferred to a refrigerant recovery tank. This tank is specifically designed to store and transport refrigerants, including Freon. Follow these steps to transfer the recovered Freon:- Ensure that the refrigerant recovery tank is in good condition and properly labeled.
- Connect the recovery tank to the recovery machine using the appropriate hoses and connectors.
- Open the valve on the recovery tank.
- Start the recovery machine and allow it to pump the recovered Freon into the tank.
- Monitor the process to ensure the Freon is transferred completely and efficiently.
- Once the transfer is complete, close the valve on the recovery tank to prevent any leaks or spills.
Follow Local Regulations For Disposal
Disposing of Freon improperly can have serious consequences for the environment and may also lead to legal penalties. It is important to familiarize yourself with the local regulations regarding the disposal of hazardous materials, including Freon. Here are some general guidelines to follow:- Research and identify the proper disposal methods and facilities in your area.
- Contact your local environmental agency or waste management authority for guidance on the disposal process.
- Comply with any specific requirements or restrictions enforced by your local authorities.
- Record and document the disposal process, including the date, time, and location of disposal, to ensure accountability.
- Do not attempt to dispose of the Freon by pouring it down drains, sewers, or onto the ground, as this can contaminate water sources and harm the environment.

Credit: www.dumpsters.com
Conclusion
Draining Freon from your car is a crucial process to ensure the safety and efficiency of your vehicle’s air conditioning system. By following the steps outlined in this blog post, you can confidently remove the old refrigerant and replace it with new, helping your car stay cool during hot summer months.
Remember to handle Freon responsibly and never release it into the atmosphere. Keep your car running smoothly and enjoy a comfortable ride all year round.


