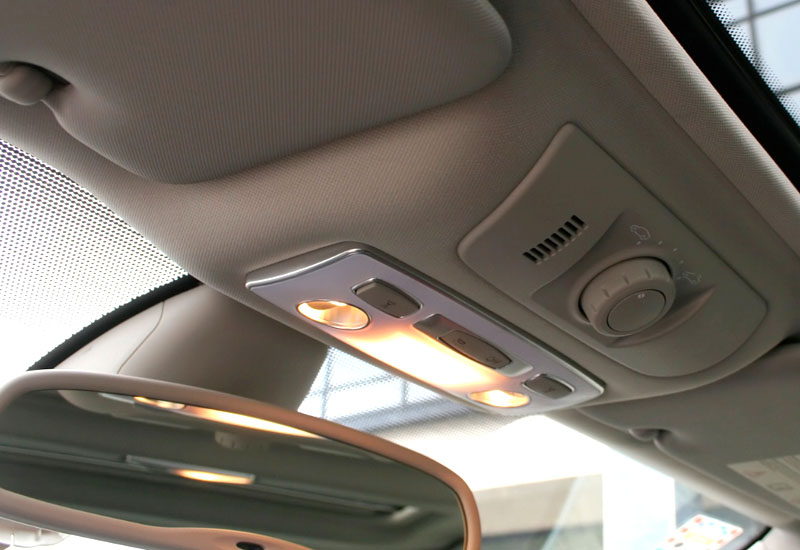
When it comes to car maintenance, we often overlook the interior surfaces that aren’t as easily seen as the dashboard or seats, and one of the most commonly neglected areas is the headliner. The headliner is the material covering the ceiling of your car’s interior, and while it may not be the first thing you notice when you get inside, it plays a significant role in the car’s overall appearance.
Over time, it can accumulate dust, stains, and even mildew, making the car feel dirty or less inviting. Fortunately, cleaning the headliner is a task that can be done by yourself, saving you time and money. In this guide, we will walk you through the process of cleaning your car’s headliner and offer some helpful tips to maintain its cleanliness.

Why You Should Clean Your Car’s Headliner
The headliner of your car does more than just add to the interior’s aesthetic. It serves several functional purposes, such as providing insulation and helping with soundproofing. Over time, however, dirt, oils, and moisture can build up on the fabric, creating an unappealing appearance. In some cases, this buildup can even lead to odors or potential mold growth. Cleaning the headliner not only helps maintain the overall look of your car but also prevents these issues from becoming more severe.
Regular cleaning of your car’s headliner ensures that it remains in good condition, prolonging its lifespan and preserving the interior’s overall appeal. Whether it’s a simple dusting or dealing with more stubborn stains, a good cleaning can make your car feel fresher and more pleasant to drive. Let’s dive into the step-by-step process of how you can clean your car’s headliner safely and effectively.
Step-by-Step Guide to Cleaning Your Car’s Headliner
Cleaning the headliner requires a careful approach. Since the material is usually made from fabric or foam-backed material, it can be delicate and may tear or get damaged if not treated properly. The goal is to remove dirt and stains without compromising the integrity of the headliner. Below, we’ll discuss the process of cleaning your car’s headliner in detail, starting with the preparation and ending with finishing touches.
1. Gather Your Cleaning Supplies
Before you start cleaning, gather all the necessary tools and materials. It’s important to use the right products so you don’t damage your headliner or leave any unwanted residue behind. Here’s a list of what you’ll need:
- Vacuum with upholstery attachment – This is to remove any loose dirt or debris before you start cleaning.
- Microfiber cloths – Soft and non-abrasive, microfiber cloths help gently wipe the surface without leaving scratches or lint.
- Upholstery cleaner – A fabric-safe cleaner designed for cars, preferably one that is suitable for delicate materials.
- Water and mild soap solution – A gentle solution to tackle stains if you don’t want to use a commercial cleaner.
- Spray bottle – To apply water or a cleaning solution to the headliner.
- Soft-bristled brush – A brush can help scrub away stubborn stains without damaging the fabric.
- Bucket – If you’re using a soap and water solution, it helps to have a clean bucket to mix the solution.
2. Start by Vacuuming
The first step in cleaning your car’s headliner is to remove all the loose dirt and dust. Begin by using a vacuum cleaner equipped with an upholstery attachment. Gently vacuum the entire headliner, starting from the front and working your way back.
Be sure to get into the seams and corners where dust and dirt often accumulate. This will help prevent dirt from becoming embedded in the fabric during the cleaning process and will give you a cleaner starting surface.
Take extra care to avoid using too much pressure while vacuuming, as this could damage the material. Instead, allow the vacuum to do most of the work. This step is important because removing loose debris will make it easier to clean and prevent any grime from smudging when you apply the cleaning solution.
3. Treat Stubborn Stains
Once the vacuuming is done, it’s time to focus on the spots or stains that might be lingering on the headliner. Stains can come from food, drinks, oils, or even bodily oils from passengers, which tend to stick to the fabric more easily. You can use either an upholstery cleaner specifically designed for automotive use or a homemade cleaning solution, depending on what you feel most comfortable with.
Using Upholstery Cleaner:
If you’re using a commercial upholstery cleaner, apply a small amount of the product to a clean microfiber cloth, and gently blot the stained area. Avoid spraying the cleaner directly onto the headliner, as excess moisture can seep into the foam backing and cause damage. After blotting, use a dry part of the cloth to wipe away the cleaner. Repeat the process until the stain is gone.
Homemade Soap Solution:
Alternatively, you can create your own cleaning solution by mixing warm water with a few drops of mild dish soap. Pour the solution into a spray bottle, then lightly mist the stained area, being careful not to soak the fabric. Once the solution is applied, gently scrub the area with a soft-bristled brush, moving in small, circular motions. Use a microfiber cloth to blot and lift off the moisture, and repeat if necessary.
4. Clean the Entire Headliner
After treating any stains, it’s time to clean the entire headliner. You can use either an upholstery cleaner or a mild soap-water solution, depending on your preference. If you are using the homemade soap solution, spray a small amount of it onto a microfiber cloth (not directly onto the headliner), then gently wipe the surface. Be sure to work in sections, starting at the front of the car and moving to the back, so that no section dries out before you’ve cleaned it.
If the headliner looks excessively dirty or has not been cleaned in a while, you may want to go over it a second time to ensure a thorough cleaning. It’s important to avoid over-wetting the headliner, as too much moisture could lead to mold or mildew growth, or the fabric could start to loosen from the backing.
5. Dry the Headliner
Once you’ve finished cleaning, it’s crucial to allow the headliner to dry completely before reusing your car. The fabric should dry naturally, and it’s best to leave the car doors open to allow air circulation. If you’re in a hurry, you can use a fan to speed up the drying process, but avoid using a blow dryer or any direct heat source, as this can cause damage to the fabric.
You can also use a clean, dry microfiber cloth to blot off any excess moisture. Be gentle during this step to avoid damaging the material.
6. Maintain Your Headliner
Once your headliner is clean, it’s essential to maintain it to keep it looking good for as long as possible. Regularly vacuuming and wiping the surface can help prevent dirt buildup. Avoid eating or drinking in the car to reduce the chance of stains, and make sure to address any spills or stains as soon as they happen. Additionally, keeping the car windows closed during wet weather can help protect the headliner from excess moisture and potential mildew growth.
Another great tip is to use a fabric protector spray to help repel dirt and stains in the future. These sprays form a protective barrier on the fabric, which can make it easier to clean up any spills or stains before they set.
Common Headliner Issues and How to Fix Them
While cleaning your car’s headliner is essential, it’s also important to address other issues that may arise. Over time, headliners can sag, get damaged, or develop mold growth. If you notice any of these issues, here are a few tips for dealing with them:
Sagging Headliner
If your headliner is sagging, it’s often due to the adhesive that holds the fabric in place deteriorating over time. You can fix this by reapplying a fabric adhesive specifically designed for automotive use. Carefully lift the fabric, apply the adhesive, and press it back into place. Be sure to allow the adhesive to dry completely before using the car again.
Mold or Mildew
Mold or mildew growth is a common issue in humid climates. If you spot mold or mildew on your headliner, it’s essential to clean it quickly to prevent it from spreading. You can use a solution of equal parts water and white vinegar to treat the affected areas. Lightly spray the solution onto the headliner and gently scrub with a soft brush, then wipe with a microfiber cloth. Make sure the area dries thoroughly after cleaning to prevent future mold growth.
Are These Questions in Your Mind?
Is it safe to clean the headliner in my car?
Yes, cleaning your car’s headliner is safe as long as you follow the proper cleaning methods and avoid using too much water or harsh chemicals.
Can I use a regular household cleaner to clean the headliner?
It’s best to use a cleaner specifically designed for upholstery or a mild soap solution to avoid damaging the fabric.
Do I need to remove the headliner to clean it?
No, you don’t need to remove the headliner to clean it. You can clean it while it’s still in place by using the proper tools and cleaning methods.
Is it possible to remove stains from a fabric headliner?
Yes, most stains can be removed from a fabric headliner with the right cleaning products, like an upholstery cleaner or a mild soap solution.
Can I use a pressure washer to clean the headliner?
No, it’s not recommended to use a pressure washer, as the high water pressure can damage the fabric or loosen the adhesive holding the headliner in place.
Do I need to use a special cleaner for a leather headliner?
If your car has a leather headliner (which is rare), it’s best to use a cleaner specifically designed for leather to avoid damaging the material.
Can I use a steam cleaner on the headliner?
Steam cleaners can be effective for cleaning headliners, but they should be used carefully to avoid over-wetting the material. Always follow the manufacturer’s instructions.
Is it necessary to apply a fabric protector after cleaning the headliner?
While it’s not strictly necessary, applying a fabric protector can help repel stains and dirt, making future cleaning easier.
Do I need to be concerned about the glue when cleaning a headliner?
Excessive moisture can weaken the glue holding the headliner, so it’s important to avoid oversaturating the fabric.
Can I fix a sagging headliner myself?
Yes, you can reattach a sagging headliner by using a fabric adhesive, but make sure you follow the right steps to avoid further damage.
I hope this guide has provided you with all the information you need to clean and maintain your car’s headliner properly. Regular cleaning can help ensure that your vehicle’s interior looks fresh and inviting while preserving the functionality and appearance of your headliner. With the right tools and techniques, you can tackle the task easily and effectively.


