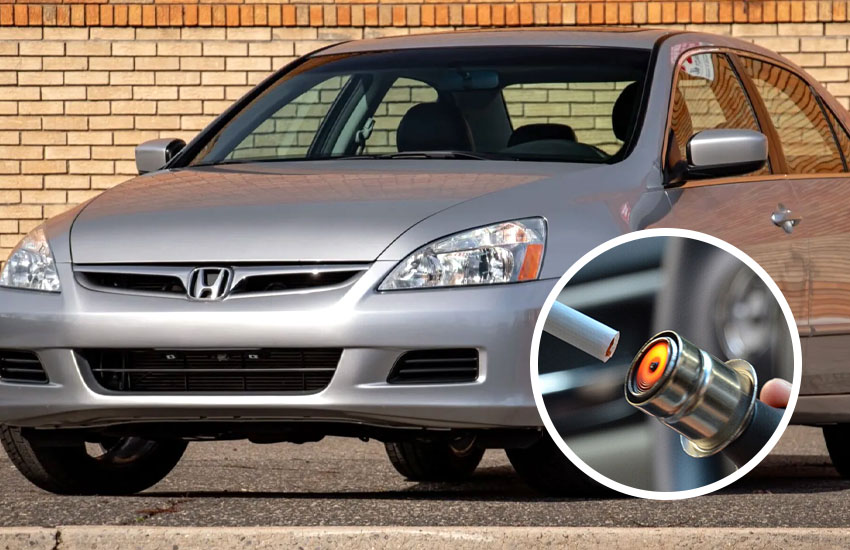
Ever found yourself in your 2006 Honda Accord, reaching for the cigarette lighter to power up your phone or light a cigarette, only to discover it’s not working? It’s a frustrating issue that’s actually pretty common, but don’t worry! We’re going to walk through everything you need to know to troubleshoot and fix your cigarette lighter. Whether you’re new to car repairs or just looking for a quick fix, you’ll be able to handle this like a pro. Let’s dive in!
Why is My Cigarette Lighter Not Working in My 2006 Honda Accord?
Before you start tearing apart your car, it’s helpful to understand why your cigarette lighter might be acting up. There are a few main culprits that could be causing the issue: a blown fuse, a dirty or damaged socket, a malfunctioning cigarette lighter, or possibly some wiring issues. Understanding these issues will give you a clearer idea of where to start looking when troubleshooting.
Power Supply Issues: Is the Fuse Blown?
One of the most common reasons for a cigarette lighter not working is a blown fuse. The fuse acts as a safety feature that protects the electrical system in your car from overload. If something goes wrong, the fuse “blows,” cutting off power to the lighter and preventing it from working.
So how do you know if the fuse is the problem? It’s actually pretty easy to check. To get started, locate your fuse box (which we’ll discuss in detail later) and find the fuse connected to the cigarette lighter. If it’s blown, all you need to do is replace it.
Here’s a quick tip: You’ll want to replace the blown fuse with one that has the same amperage rating. If you use a fuse with a higher or lower amperage, you could risk damaging your car’s electrical system or creating a fire hazard.
Faulty Cigarette Lighter Socket
If you’ve checked the fuse and it’s not the issue, the next culprit could be the cigarette lighter socket itself. Over time, the socket can get dirty, corroded, or damaged, causing the lighter to fail. Common causes of this are frequent use, dirt buildup, or exposure to moisture.
If the socket is dirty or corroded, cleaning it might be the solution. You can clean it using rubbing alcohol and a small brush, but be very careful not to damage the internal components. If cleaning doesn’t help, the socket might be physically damaged, in which case you’ll need to replace it.
A damaged socket might be trickier to diagnose, but if you notice any bent metal parts, rust, or strange smells (like something burning), it’s a sign that the socket needs to be replaced.
Problems with the Lighter Itself
Sometimes, the problem isn’t with the socket or the fuse, but with the lighter itself. The lighter has a heating element inside it, and over time, this element can burn out or wear down. If you’ve used the lighter a lot or it’s an older model, the heating element may no longer work, causing the lighter to fail.
A simple way to check if the lighter itself is faulty is to test it in a different car or in a different socket in your own car. If the lighter doesn’t work in multiple sockets, it’s probably time to replace it.
Wiring Issues: Loose or Damaged Connections
If the fuse is intact, the socket is clean, and the lighter is functioning properly, but the lighter still isn’t working, then it might be an issue with the wiring. The wires that connect the cigarette lighter to the electrical system could have become loose, disconnected, or damaged. This is a more complicated issue and might require a little more skill to fix.
The wiring could be damaged somewhere under the dashboard, which means you may need to remove panels or the dashboard to gain access. If you’re not comfortable with handling the wiring or using tools, it might be best to call a professional mechanic or auto electrician.
How to Troubleshoot the Cigarette Lighter Issue in Your Honda Accord
Now that we know what might be causing the issue, let’s break down how to troubleshoot it step by step. Don’t worry – troubleshooting your cigarette lighter is easier than it sounds, and you don’t need any fancy tools or previous car repair experience to get the job done.
Step 1: Check the Fuse
The first thing you want to do when your cigarette lighter stops working is to check the fuse. This is usually the easiest and quickest fix. Here’s how to check:
- Locate the Fuse Box: In your 2006 Honda Accord, the fuse box is typically located beneath the dashboard on the driver’s side, or in the engine compartment. If you’re not sure where it is, refer to your owner’s manual, which will give you the exact location.
- Remove the Fuse Box Cover: Carefully remove the cover to access the fuses. Most fuse boxes have a diagram on the inside of the cover, showing you where each fuse is located. Look for the one labeled “CIG” or “Accessory,” as these are the ones that control the cigarette lighter.
- Check for a Blown Fuse: A blown fuse will have a visible break in the metal strip inside. If the metal strip looks damaged, it means the fuse is blown and needs to be replaced.
- Replace the Fuse: To replace the blown fuse, use a fuse puller (or just your fingers) to remove it from the socket. Make sure you replace it with a fuse that has the same amperage. You can find replacement fuses at any auto parts store or online.
- Test the New Fuse: Once you’ve replaced the fuse, insert your cigarette lighter into the socket and test it. If it works, you’ve solved the problem!
Step 2: Inspect the Cigarette Lighter Socket
If the fuse is fine, but the cigarette lighter still isn’t working, the next step is to inspect the socket. Over time, dirt, dust, and grime can build up inside the socket, preventing the lighter from making a good connection.
Here’s how to clean the socket:
- Turn off the Car: First, make sure your car is turned off to avoid any electrical mishaps.
- Clean the Socket: Take a small brush or a cotton swab and dip it into rubbing alcohol. Gently clean the inside of the socket, paying special attention to the metal contacts. You may also use a small piece of cloth to wipe down the socket.
- Check for Corrosion or Damage: Look for any visible signs of corrosion or physical damage. If the socket looks damaged, you may need to replace it (which we’ll discuss next).
- Test the Socket: After cleaning, test the socket with your cigarette lighter. If it’s still not working, the socket might be too damaged to fix and may need replacing.
Step 3: Check the Lighter
If the fuse and socket are both fine, but your lighter still isn’t working, the next thing to check is the lighter itself. A malfunctioning heating element inside the lighter can prevent it from working. Here’s how to check:
- Test Another Lighter: If you have another working lighter, try using it in the same socket. If the new lighter works, then the problem is with your original lighter.
- Replace the Lighter: Replacing the lighter is easy. Simply pull out the old one and insert the new one into the socket. You can find replacement lighters at most auto parts stores, or even online.
- Test the New Lighter: Once you’ve inserted the new lighter, test it out. If it heats up, you’ve solved the problem.
Step 4: Examine the Wiring and Connections
If the fuse is fine, the socket is clean, and the lighter works, but the lighter still doesn’t function, then the issue may lie with the wiring. This is a more complex issue, and it might require some experience working with electrical systems.
- Check for Loose Connections: Look around the cigarette lighter socket for any loose or disconnected wires. You might need to remove parts of the dashboard or panels to get access to the wiring.
- Look for Damaged Wires: Inspect the wiring for any visible signs of damage, such as fraying, burns, or tears.
- Reconnect or Replace Damaged Wires: If you find any damaged wires, either reconnect them or replace them with new wiring.
- Seek Professional Help: If you’re unsure about handling the wiring or if the problem persists, it’s best to consult a professional mechanic or auto electrician.
How to Replace the Cigarette Lighter Socket
If you’ve determined that the socket itself is broken or beyond cleaning, you may need to replace it. Here’s how you can do it:
Tools You’ll Need:
- New cigarette lighter socket
- Small screwdriver
- Panel removal tool (optional)
- Socket wrench (optional)
- Electrical tape (optional)
Step 1: Remove the Dashboard Panel
To access the cigarette lighter socket, you may need to remove the dashboard panel surrounding the lighter. Carefully use a flathead screwdriver or a panel removal tool to pry off the panel. Be sure to do this slowly to avoid damaging any clips or connectors.
Step 2: Disconnect the Wiring
After you’ve removed the panel, you should see the back of the cigarette lighter socket. You’ll need to disconnect the wiring from the socket. This might involve loosening a few screws or bolts with a socket wrench or screwdriver.
Step 3: Install the New Socket
Take your new cigarette lighter socket and carefully connect the wiring to the new socket. Make sure the wires are securely attached, and that they match up with the correct terminals.
Step 4: Test the New Socket
Before you reassemble everything, plug your cigarette lighter into the new socket to make sure it’s working. If it heats up and functions properly, then you’re good to go!
Step 5: Reassemble the Dashboard
Once you’ve tested the socket, reassemble the dashboard panel and secure it back in place. Use the same screws or clips to reattach the panel as you removed earlier.
How to Replace the Cigarette Lighter Itself
If the cigarette lighter itself is damaged, replacing it is a fairly straightforward process. Here’s how you can replace it:
- Remove the Old Lighter: Simply pull the old lighter out of the socket. In most cases, it should come out easily.
- Insert the New Lighter: Take the new lighter and insert it into the socket. It should fit securely.
- Test the New Lighter: Plug in the new lighter and test it to make sure it heats up. If it does, you’ve successfully replaced the lighter!
Common Issues After Replacing the Cigarette Lighter
After replacing the cigarette lighter, you might run into a few issues. Here’s what you should look out for:
- Lighter Doesn’t Heat Up – This could be caused by a loose connection or faulty wiring.
- Socket Still Not Working – This suggests there’s still an issue with the socket or fuse.
- Lighter Pops Out Too Quickly – If the lighter doesn’t stay in, it could indicate that the socket is too worn out and needs replacing.
I Hope This Guide Helps You Fix Your Cigarette Lighter!
By following these steps, you should be able to troubleshoot and fix your cigarette lighter in your 2006 Honda Accord. Whether it’s a blown fuse, a dirty socket, or a broken lighter, most of these fixes are simple and affordable. But if you’re ever unsure or the issue persists, don’t hesitate to call in a professional. A quick fix could save you a lot of time and hassle in the long run.
Frequently Asked Questions
Is it safe to replace a blown fuse in my Honda Accord?
Yes, it’s absolutely safe to replace a blown fuse as long as you use a replacement fuse that matches the amperage rating. Make sure you consult your manual for the exact amperage.
Can I fix a cigarette lighter that’s not working on my own?
Yes, you can fix it on your own! Most issues with the cigarette lighter are easy to troubleshoot and fix. Check the fuse, clean the socket, or replace the lighter itself to solve the issue.
Do I need any special tools to replace the cigarette lighter socket?
Not really! Most of the tools you’ll need are basic ones, such as a screwdriver and a socket wrench. You might also need a panel removal tool to take apart the dashboard.
Is it possible to repair the wiring if it’s damaged?
Yes, you can repair damaged wiring by either reconnecting the wires or replacing the damaged section with new wiring. If you’re not familiar with electrical repairs, consider getting professional help.
Can I use a regular fuse to replace a blown one?
No, it’s important to use the exact same amperage fuse to replace a blown one. Using the wrong fuse can cause more damage to your car’s electrical system.
Is it normal for the cigarette lighter to stop working over time?
Yes, over time, cigarette lighters can wear out or stop working due to frequent use or exposure to dirt and moisture. Regular maintenance can help extend the life of your lighter.
Do I need to remove the entire dashboard to fix the cigarette lighter?
In most cases, you won’t need to remove the entire dashboard. You just need to access the fuse box or the cigarette lighter socket, which should be fairly easy to do.
Can I replace the cigarette lighter socket myself?
Yes, replacing the socket is a manageable task. With the right tools and a bit of patience, you can easily replace the socket and restore your cigarette lighter.