When your car starts making that high-pitched squeal every time you stop, it’s easy to panic. I remember the first time my own brakes warned me like that, and I spent a week worrying if I’d have to sell my car. Brake pads and rotors don’t just wear out overnight—they slowly signal danger. Understanding replacement costs, the right timing, and what affects the price can save both your wallet and your sanity. Let’s break it down together, with no fluff, just practical advice.
Know when your brake pads and rotors need replacing by watching for noise, vibration, or a soft pedal feel. Check your car’s manual for manufacturer intervals, compare local shop quotes, and factor in labor and parts quality. Consider rotor resurfacing versus replacement. Always replace pads in pairs, keep an eye on wear patterns, and never ignore warning signs. Maintaining clean, properly lubricated calipers and regularly inspecting brakes prevents costly mistakes. Budget ahead for high-performance or specialty vehicles to avoid surprise expenses.
Signs Your Brakes Need Immediate Attention
You don’t need a mechanical degree to notice when your brakes are unhappy. One morning, I felt a soft, squishy pedal while slowing down, and my stomach sank. That subtle change is a critical signal. Brake pads compress over time, and once they’re too thin, your rotors take the hit. If left unchecked, you risk warped rotors, longer stopping distances, and a major repair bill. Pay attention to squeaks, grinding sounds, or vibrations through the steering wheel—they’re more than annoyances.
Visual inspection is another lifesaver. Pop the wheel and check the pad thickness. Most new pads are around 10-12 mm thick; once they drop below 3 mm, replacement is urgent. Rotors can also show grooves, rust, or bluish discoloration from heat, which affects braking performance. Driving with compromised brakes is not worth the risk, even if your car feels fine otherwise.
Finally, listen to your car’s warning lights. Many modern cars have brake wear indicators built into the system. When the brake warning light comes on, it’s rarely a false alarm. Treat it like a red flag in a traffic jam: stop and inspect immediately.
- Soft brake pedal indicates wear
- Squealing or grinding sounds
- Visible rotor grooves or discoloration
- Brake warning lights activated
Understanding Brake Pads and Rotors Replacement Costs
The cost of replacing brake pads and rotors varies widely depending on your car, part quality, and labor rates. On average, expect $150-$300 per axle for standard pads and $200-$400 for rotors. Luxury or performance vehicles can easily double that. When I first got my sports car serviced, I was shocked at the bill until I realized performance rotors require premium materials. Knowing this upfront prevents sticker shock.
Parts quality affects both cost and lifespan. Standard OEM pads are cheaper but wear faster, while ceramic or semi-metallic pads last longer and reduce rotor damage. Rotors also come in standard, drilled, or slotted types; each impacts price and braking feel. Labor is another factor. Shops typically charge $100-$150 per axle, depending on complexity. Doing the job yourself can save money but requires proper tools and safety knowledge.
Don’t forget additional fees like brake fluid, caliper servicing, or disposal costs. Many shops bundle these into the quote, but ask upfront. Planning for the total cost ensures you avoid surprises and keeps your car safe and reliable.
- Standard pad and rotor replacement averages $350-$700
- Performance parts increase cost
- Labor can range $100-$150 per axle
- Additional services may add $50-$100
How to Save Money Without Compromising Safety
I’ve learned that trying to cut corners on brakes is a fast way to regret it. One trick is comparing quotes from independent shops versus dealerships. I saved nearly $200 by choosing a trusted local mechanic for my sedan. Also, consider resurfacing rotors if they’re still thick and straight; it’s cheaper than replacement but requires professional equipment.
Buying quality parts online and bringing them to a shop can also reduce cost, but only if the shop allows it. Check compatibility and warranty carefully. Avoid bargain-bin pads that wear unevenly or create excess dust; these often cost more in the long run.
Another money-saving strategy is to maintain your brakes proactively. Keep calipers clean, avoid heavy braking when unnecessary, and rotate tires regularly. Small habits extend both pad and rotor life. Also, replace pads in pairs, front or rear, to prevent uneven wear, which can cause vibrations or costly rotor damage.
- Compare local shop vs dealership quotes
- Resurface rotors when possible
- Purchase high-quality parts online
- Maintain brakes to extend lifespan
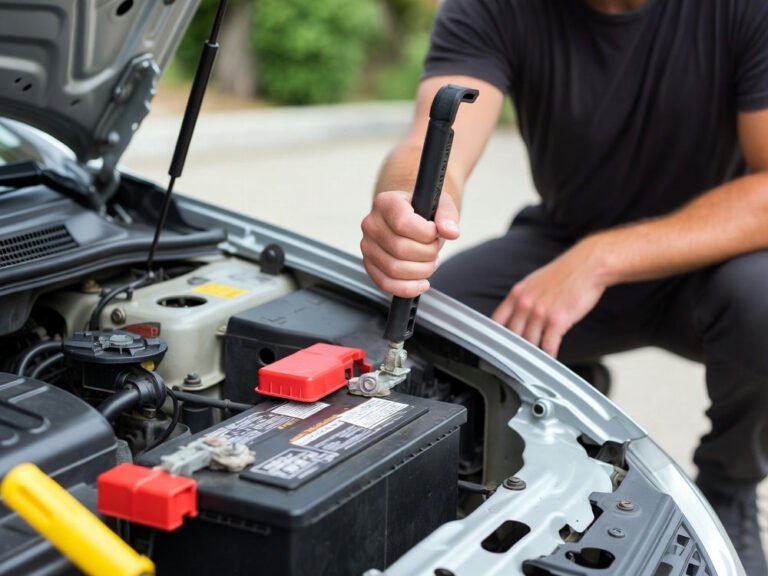
DIY vs Professional Replacement: What You Should Know
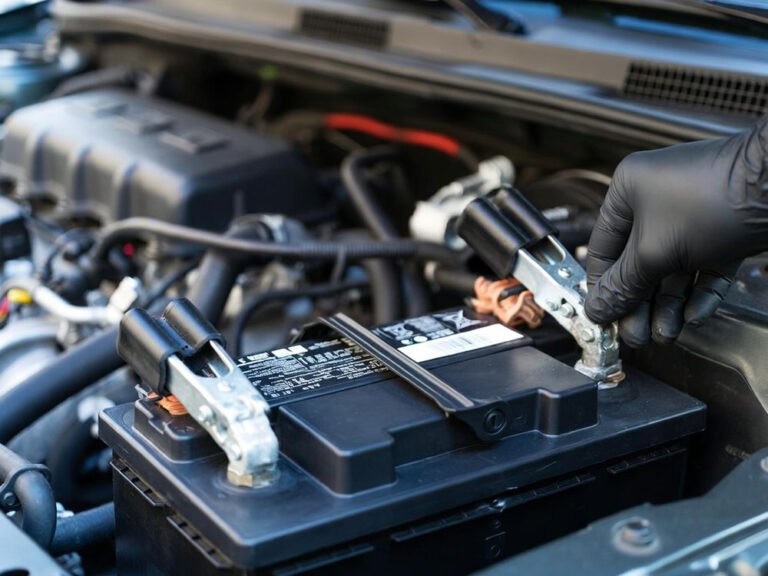
Replacing brake pads and rotors yourself can be rewarding, but it’s not a weekend hobby unless you have the right setup. I once tried a DIY replacement with a borrowed jack and ended up frustrated with stuck caliper bolts. Safety is key. You need solid jack stands, torque wrenches, and a clean workspace.
Follow the correct torque specifications and bedding-in process for new pads and rotors. Incorrect installation can cause noise, uneven wear, or even brake failure. Many DIY guides skip nuances like cleaning caliper slides or lubricating the contact points, which prevent squealing and premature wear.
Professional shops handle these details and guarantee work, which is worth considering for high-performance or heavy vehicles. Even experienced DIYers sometimes call a shop for stubborn bolts or rotors. In the end, it’s about weighing time, skill, and peace of mind versus saving a few hundred dollars.
- DIY requires proper tools and workspace
- Correct torque and bedding-in are essential
- Cleaning and lubrication prevent noise
- Professional shops offer safety and guarantees
Common Mistakes to Avoid When Replacing Brakes
One of the most common mistakes I’ve seen is ignoring early warning signs. Waiting until you hear grinding can double your costs. Another mistake is replacing only one pad or rotor instead of both sides; it leads to uneven braking and steering pull.
Improper torque is another sneaky culprit. Overtightening bolts can warp rotors, while under-tightening is a safety hazard. Many DIYers skip brake fluid inspection or fail to bleed air out of the system, resulting in soft pedals. Also, mixing pad types between axles can cause vibrations and noise. Always use matching pads and rotors for each axle.
Lastly, never overlook the calipers and hardware. Rusty slides, worn clips, or dirty surfaces can reduce pad life. Small maintenance steps, like cleaning contact points and applying brake grease, save money and stress. I learned this the hard way when squealing returned a month after replacement.
- Replace pads and rotors in pairs
- Torque bolts correctly
- Check brake fluid and bleed system
- Maintain calipers and hardware
How Driving Habits Affect Brake Longevity
Your driving style has a huge impact on how often you replace pads and rotors. I once switched from city commuting to highway driving and noticed my brakes lasted longer than expected. Frequent hard stops, stop-and-go traffic, and carrying heavy loads all accelerate wear.
Smooth, gradual braking preserves pads and rotors. Avoid riding the brakes downhill; instead, use engine braking when possible. Parking on hills with the handbrake reduces stress on rear brakes if used correctly. Seasonal factors matter too—salt, dirt, and water exposure can accelerate rotor rust and pad corrosion, shortening lifespan.
Keeping an eye on tire alignment and suspension health also matters. Uneven tires can cause certain wheels to wear pads faster. Small adjustments in driving habits, combined with routine inspections, can significantly stretch your brake life and reduce costs.
- Hard stops wear pads faster
- Use engine braking and smooth braking
- Avoid overloading your vehicle
- Check alignment and suspension
| Action | Details | Tips |
|---|---|---|
| Inspect Pads | Check thickness and wear every 6,000 miles | Replace below 3 mm |
| Check Rotors | Look for grooves, rust, or blue discoloration | Resurface if thickness allows |
| Listen | Squealing, grinding, or vibration | Don’t ignore early signs |
| Shop Quotes | Compare 2–3 local shops | Ask for itemized costs |
| DIY Safety | Use jack stands and torque wrenches | Clean workspace and wear gloves |
| Replace Pairs | Always front or rear in pairs | Avoid uneven wear and pull |
| Brake Fluid | Inspect and bleed if needed | Use correct fluid type |
| Driving Habits | Smooth braking, avoid hard stops | Engine braking reduces wear |
Final Thoughts
Brake pads and rotors are more than just parts—they’re your safety net on the road. Understanding replacement costs, spotting warning signs early, and maintaining your brakes prolongs their life and protects you from emergencies. Invest in quality parts, adopt smart driving habits, and plan ahead. A little attention now prevents big bills later, keeping your car smooth, safe, and reliable.
Frequently Asked Questions (FAQs)
Is it normal for new brakes to squeak?
Yes, minor squeaking can happen with new pads as they bed in against the rotors. This usually disappears after 100-200 miles. Avoid panic, but ensure the sound isn’t grinding, which indicates contact with metal. Proper lubrication of caliper slides and backing plates can eliminate most squeaks. Ceramic pads tend to be quieter, while semi-metallic pads may squeak initially. Always check torque and installation if noise persists.
Can I replace rotors without changing the pads?
It’s possible, but not recommended. Old pads can have uneven wear and transfer grooves onto new rotors. This reduces braking efficiency and can shorten rotor life. For safety and longevity, replace pads and rotors together whenever one is replaced. Some mechanics resurface rotors, but this still requires careful matching with pad type.
Do I need special tools for DIY brake replacement?
Yes, essential tools include a jack, jack stands, torque wrench, socket set, and C-clamp or caliper tool. Optional tools like a brake cleaner, caliper grease, and a rubber mallet help with smoother installation. Safety is critical—never rely on a jack alone, and always follow manufacturer torque specs. Proper tools prevent accidents and ensure correct brake performance.
Is it expensive to replace brakes on luxury cars?
Luxury or performance cars often require premium pads and rotors, which can cost double or triple standard parts. Labor may also be higher due to complex caliper setups. Expect $500-$1,200 per axle in many cases. Shop around and consider certified independent mechanics to reduce costs while maintaining quality.
Can I resurface my rotors instead of replacing them?
Yes, if the rotor is thick enough and not warped, resurfacing is cheaper than replacement. However, this requires professional equipment and expertise. Resurfacing removes grooves and restores a smooth surface. Be cautious—rotors that are too thin or have heat cracks should be replaced instead to maintain safe braking.
Do I need to bed in new brake pads?
Absolutely. Bedding allows pads to mate evenly with the rotors, improving performance and reducing noise. Follow a gentle acceleration and braking process over several miles. Avoid heavy stops during the initial break-in period. Skipping this step can cause vibrations, noise, and uneven wear.
Is it safe to drive with worn rotors?
No, driving with worn or warped rotors is dangerous. It reduces braking efficiency, increases stopping distance, and can lead to accidents. You may feel vibrations, hear grinding, or notice pulling while braking. Replace or resurface rotors promptly to ensure safety.
Can weather affect brake wear?
Yes, salt, dirt, rain, and snow accelerate rotor corrosion and pad wear. Winter conditions especially require more frequent inspections. Cleaning brakes after exposure to road salt and maintaining dry storage can extend life. Driving habits also matter—gentle braking in adverse conditions prevents excessive wear.